Friday, February 20, 2015

Non-Objective Pattern Sculptures with Sol Lewitt


Lesson Objective:  
Work with the elements of line and space 
Work with the art principles of pattern and unity
Create a 3-D composition
Use paper Construction

Key Vocabulary: 
Non-objective sculture
Free standing Sculpture
Unity

Materials: 
Note Cards in two sizes
Glue
Black Card stock base
Fine point black sharpies

Focus Artist: Sol Lewitt: Pattern and structures 
Also study: Revisit:  Dongo Artwork to review and connect. 
Project requirements: 
Drawing is non-objective and shows attention to detail
Drawings incorporate 20 different patterns 
Small Group Critique at Midway point
Sculpture is free standing and non-objective
Shows unity through repetition of color and shape. 

Assessment:
Informal: Small Group Critique
Formal: Final Grading

CA Art Standards
1.1 Identify and use the principles of design to discuss, analyze, and write about visual aspects in the environment and in works of art, including their own.
1.4 Analyze and describe how the composition of a work of art is affected by the use of a particular principle of design.
2.1 Solve a visual arts problem that involves the effective use of the elements of art and the principles of design.
2.2 Prepare a portfolio of original two-and three-dimensional works of art that reflects refined craftsmanship and technical skills.

Modifications: 
English Language Learner: Handout for project, project samples, Power point with visuals, Critique for additional understanding, Demonstration of techniques
Special Needs: Handout for project, project samples, Power point with visuals, Critique for additional understanding, Demonstration of techniques
Accelerated Learner: Expand on skills learned to create a unique project. 
Advanced art students will be asked to increase the difficulty of their pattern making and increase the final number of  paper rolls from 20 to 30. 

Scaffolding adaptations: 
Students will see several examples of each art element in different artwork shown in the power point. Notes on the elements of art will be taken throughout discussions for added understanding. Creating each side and Constructing the cube will be demo started in class using guided instruction. 

Day 1: 
Go Through Power Point Slides
Review: Dango Artwork to connect learning
Discuss Sol Lewitt’s artwork
Interpret line drawings as Principles and elements of design
State Project Objectives, Materials, Project Requirements, Due Dates
Plan ideas for patterns 


Day 2-4: Students will create 20 different patterns on 1/2 index cards

Day 3: Art Link: Peer Critique feedback on cards 
Focus on Line and pattern
Day 4: 
Art Link: Have students draw their ideas for construction
Roll 5 Cards to begin construction on Day 5
Day 5-8: Students will roll and construct sculptures. 
Day 6: Peer critique on cards and sculpture progress. 
Continue making cards throughout. 

Students who work quickly could be asked to create additional patterns on Cards
Students who work slowly will be checked-on regularly with possible adaptations of fewer then 20 notecards. 

Last Day of Sculpture: 
Art Link: Self Critique: 
Describe, Analyze, Interpret and Evaluate. Draw on your notes and the rubric to complete for 10 points. 
Complete Rubric and turn in sculpture. 

Evaluation: successful for all engaged students and all abilities of students. Wonderful outcome

20 pattern minimum is accomplishable in the 3 days of studio time. 


Saturday, February 14, 2015

Organic Subtraction Sculpture with Ra Paulette


Lesson Objective 
Work with elements of art: Shape, Color
Work with Principles of Art: Unity 
Create an Organic Subtraction sculpture in the style of Ann Weber or Ra Paulette

Key Vocabulary: 
Organic Shape: Organic shapes and forms are typically irregular or asymmetrical. Organic shapes are often found in nature, but man-made shapes can also imitate organic forms.
Anthropomorphic:  Described or thought of as being like human beings in appearance, behavior.
Analogous Color: Analogous colors are groups of colors that are adjacent to each other on the color wheel, with one being the dominant color, which tends to be a primary or secondary color, and two on either side complementing, which tend to be tertiary.
Monochromatic: Are derived from a single base hue and extended using its shades, tones and tints. Tints are achieved by adding white and shades and tones are achieved by adding a darker color, gray or black.

Materials: 
Floral Foam
Clay Tools
Acrylic Paints in Analogous Colors 
White glue

Focus Artist/s: 
Ra Paulette
Ann Weber

Project Requirements
Subtract from a Floral Foam Block exploring organic shape and unity in the style of Ra Paulette and/or Ann Weber
Sketchbook: Students draw construction/color plans for each side of their Organic Subtraction sculpture and submit plans for approval. 
Final Sculpture: 
Organic shape and unity with Paulette/Weber influence apparent
Analogous/Monochromatic colors present on ALL sides final sculpture
Assessment: 
Informal: Written Self Critique
Formal: Artist Statement
Formal: Grading final sculpture

CA STANDARDS: 
1.1 Analyze and discuss complex ideas, such as distortion, color theory, arbitrary color, scale, expressive content, and real versus virtual in works of art.
1.2 Discuss a series of their original works of art, using the appropriate vocabulary of art.
2.1 Solve a visual arts problem that involves the effective use of the elements of art and the principles of design.
2.2 Plan and create works of art that reflect complex ideas, such as distortion, color theory, arbitrary color, scale, expressive content, and real versus virtual.
4.2 Identify the intentions of artists creating contemporary works of art and explore the implications of those intentions.
4.5 Employ the conventions of art criticism in writing and speaking about works of art.
5.2 Compare and contrast works of art, probing beyond the obvious and identifying psychological content found in the symbols and images.

Modifications: 
English Language Learner: Handout for project, project samples, Power point with visuals, Critique for additional understanding, Demonstration of techniques, group activities to check for understanding
Special Needs: Handout for project, project samples, Power point with visuals, Critique for additional understanding, Demonstration of techniques
Accelerated Learner: Expand on skills learned to create a unique project. 
Advanced art students will be asked to increase the difficulty of their final sculpture They will also be expected incorporate more details and principles into the final project

Scaffolding adaptations: 
Students will revisit Shape, Color and Unity from the earlier learning. We will use similar visuals to refresh earlier learning.  Notes on Art history, Key Vocabulary and artists will be taken throughout discussions for added understanding. Creating sketchbook plans and Constructing final sculpture will be demo started in class using guided instruction. 

Anticipatory Set: Art Link: 
Small Group Critique Ra Paulette’s Cave Carvings 
Describe
Analyze
Interpret
Large Group Critique 
OBJECTIVE: Introduce working artists exploring organic artwork in subtraction.  
Create Subtraction Sculpture from a Floral Foam Block exploring organic shape and unity in the style of Ra Paulette and/or Ann Weber
Students will understand new vocabulary as is relates to visual art


DIRECT INSTRUCTION:
Power Point Presentation Ra Paulette, Ann Weber
Pre-assessment: Critique Ra Paulette’s Cave Digging 
Opening: Art Link: Photo of Ra Paulette’s Cave Digging 
Small Group Discussion
Describe the work
Analyze the artwork
Interpret The artwork 
Large Group Discussion
Discussion: Art History:
Watch Video

ARTIST: Ra Paulette: 
Born in Chicago, grew up in Indiana
68 years old
He left school to join the Navy 
He hitchhiked around the country
Years spent in a cabin without electricity or running water
He moved to New Mexico in 1977
First cave was completed in 19
Manual labor is the foundation of my self expression.  
To do it well, is a “whole-person” activity, engaging mental and emotional strengths as well as physical strength.
When excavating the caves, I break down the movements into their simplest parts and reassemble them into the most efficient patterns to accomplish the task while maintaining bodily ease.  
Like a dancer, I “feel” the body and its movement in a conscious way.  
I’m fond of calling this “the dance of digging”,  and it is the secret of how this old man can get so much done.85

Ann Weber: 
Born Jackson, Michigan 1950
Lives and works in Emeryville, California 
1987 MFA, California College of Arts and Crafts  Oakland, California 
Studied
Inspiration: working with a palette of simple forms: cylinders and circles
Her sculptures are symbolic of male and female forms in the natural world under Viola Frey
Works from the landscape
Her shapes originate from natural forms
once enlarged they become almost anthropomorphic
KEY VOCABULARY: 
Organic Shape: Organic shapes and forms are typically irregular or asymmetrical. Organic shapes are often found in nature, but man-made shapes can also imitate organic forms.
Anthropomorphic:  Described or thought of as being like human beings in appearance, behavior.
Analogous Color: Analogous colors are groups of colors that are adjacent to each other on the color wheel, with one being the dominant color, which tends to be a primary or secondary color, and two on either side complementing, which tend to be tertiary.
Monochromatic: Are derived from a single base hue and extended using its shades, tones and tints. Tints are achieved by adding white and shades and tones are achieved by adding a darker color, gray or black.

Teacher Models 
Examples of vocabulary on the board throughout discussion 
Students take notes in their sketchbooks 
Teacher Monitors room throughout discussion
Check for Understanding: 
Monitor room during Pre-assessment in sketchbook
Monitor throughout discussion ensure comprehension and active note taking 
Various Activities Designed to check/enhance student comprehension
Ra Paulette Video
Students will watch video and take notes on Ra’s  Comments about his art

Activity: 
Sketchbook Drawing: Students will begin thinking about their ideas in their sketchbooks. 
FINAL PROJECT:  Subtract from a Floral Foam Block exploring organic shape and unity in the style of Ra Paulette and/or Ann Weber
Sketchbook: Students draw construction/color plans for each side of their Organic Subtraction sculpture and submit plans for approval. 
Final Sculpture: 
Organic shape and unity with Paulette/Weber influence apparent
Analogous/Monochromatic colors present on ALL sides final sculpture


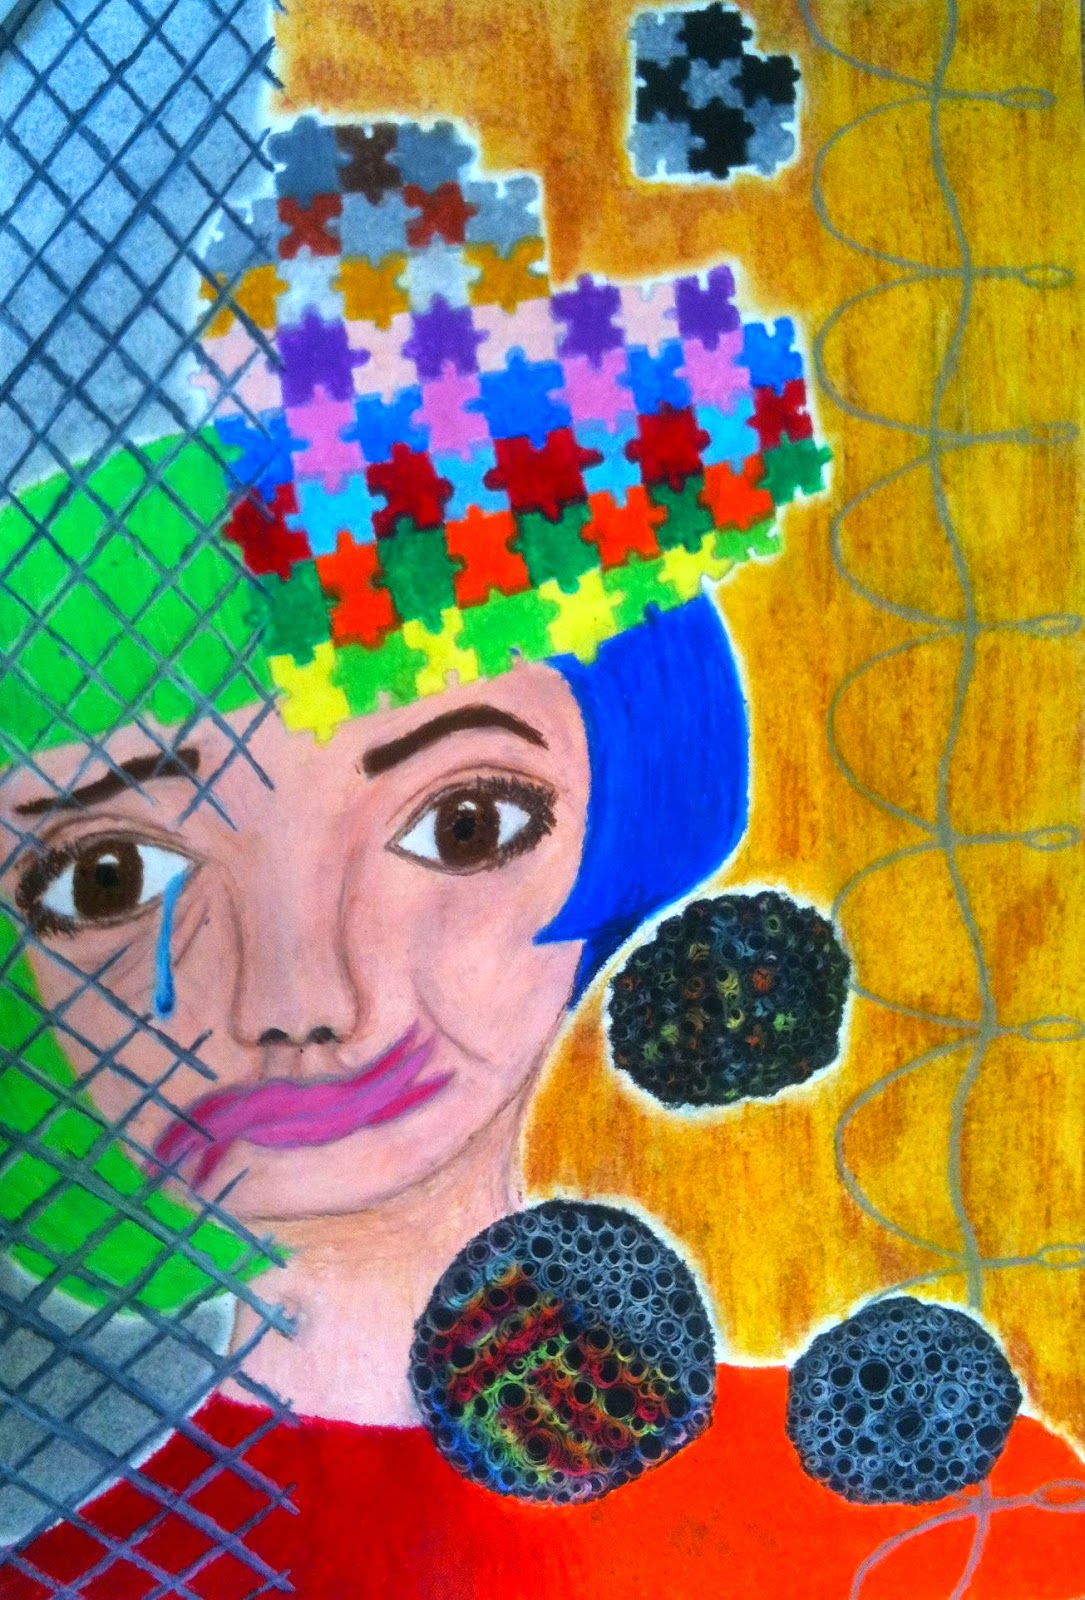
Facial Proprotion and Self Expression with Frederic Bonin-Pissarro


Facial Proprotion and Self Expression with Frederic Bonin-Pissarro 

INTRODUCTION to lesson (Anticipatory set): 

Blind Contour Drawing: 
Draw the face across from you 
Grab all details Eyes, Nose, Mouth, ears, Hair, etc.
Two Minutes

Students will: Independently complete the activity
Discuss the completed activity with group members Share final drawing with group
Participate in class discussion on the activity

OBJECTIVE: Draw and shade each part of the face: Eye, Nose, Mouth, Ear. Students will gain knowledge in proportion of the face and complete a portrait using accurate proportion and self expression
Draw a face in Blind Contour for pre-assessment
Discuss and practice drawing each item of the face over five days
Practice drawing a complete portrait in pencil
Students will be able comprehend and use these terms in relation to drawing 
Pupil Cornea Highlights Shade Tint
Iris Sclera Tragus Tip Lateral side
Tear Duct Root Dorsum Columella Philtrum
Vermilion zone

CA STANDARDS: 
1.1 Analyze and discuss complex ideas, such as distortion, color theory, arbitrary         color, scale, expressive
2.1 Create original works of art of increasing complexity and skill in a variety of media that reflect their feelings and points of view.
2.2 Plan and create works of art that reflect complex ideas, such as distortion, color theory, arbitrary color, scale, expressive content, and real versus virtual. 
3.1 Identify contemporary styles and discuss the diverse social, economic, and political developments reflected in the works of art examined.
4.4 Apply various art-related theoretical perspectives to their own works of art and the work of others in classroom critiques.
5.2 Compare and contrast works of art, probing beyond the obvious and identifying psychological content found in the symbols and images.

PURPOSE: Complete an accurate self-portrait while engaged in self-expression

INSTRUCTION: 
Students will be instructed on how to draw a segment of the face each day, beginning with the eyes. They will spend half the class in instruction and half the class practicing their new skills. Over the course of six days, they will learn the eye, nose, mouth, ear, and proportions of the face. They will complete a whole portrait in pencil before beginning their self expression, self portrait inspired by the artist Frederic Pissarro. 

MATERIALS: Sketch Books Drawing Pencils
Copy Paper Tag Board 12x18
Oil Pastels

DIRECT INSTRUCTION:
Day 1: Power Point Presentation EYE: 
Opening: In sketch Books, Blind Contour Face activity
Review: Happy Mistakes make better artists
HOLDING YOUR PENCIL
Discussion: Parts of the eye
Step by step of the eye 
Try each step in sketch book
Shading Techniques
ACTIVITY: Draw second eye next to first eye use mirror
Looking at subject as you draw it
MIRROR
Draw a partners eye from your table
CLOSURE: How are you feeling about drawing eyes? 
Teacher Models: 
Step by step of the eye 
Students simultaneously draw an eye in their sketchbooks
Shading the eye using mirror and finding highlights and shades
Check for Understanding: 
Monitor room During Step by Step Modeling in sketchbook
Monitor throughout second eye and partner eye
Day 2: Power Point Presentation NOSE 
Opening: In sketch Books, 
Think Pair Share: Eye activity Power Point
DISCUSSION: The parts of the nose
Step by step of the front nose using a mirror
Try each step in sketch book
Shading Techniques
Draw second nose next to first nose
Looking at subject as you draw it
MIRROR
DISCUSSION: Step by step of side nose 
ACTIVITY: Draw four rectangles and fill them with different noses
CLOSURE: How are you feeling about drawing the nose? 
                                           Like/dislike/rules/etc.
Teacher Models: 
Step by step of the front and side nose
Students simultaneously draw a nose in their sketchbooks
Shading the nose using mirror and finding highlights and shades
Check for Understanding: 
Monitor room During Step by Step Modeling in sketchbook
Monitor throughout four nose drawing activity
Day 3: Power Point Presentation Ear
Opening: In sketch Books, Draw a nose from the visual directions
DISCUSSION: The parts of the EAR
Step by step of the ear from the front
Using a mirror
Draw your ear
As you see it from the front
Step by step of ear from the side
ACTIVITY: Draw second ear next to first ear
Draw a partners ear from your table
Try each step from the sketch book
CLOSURE: How are you feeling about drawing the mouth? 
                                           Like/dislike/rules/etc.
Teacher Models: 
Step by step of the ear from the front
Students simultaneously draw an ear in their sketchbooks
Students have a moment to try ear from the front
Step by step of the ear from the side
Students simultaneously draw a ear in their sketchbooks
Students have a moment to try ear from the side by drawing 
A partner’s ear
Shade the new ear finding highlights and shades
Check for Understanding: 
Monitor room During Step by Step Modeling in sketchbook
Monitor throughout second mouth and partner mouth

Day 4: Power Point Presentation MOUTH
Opening: In sketch Books, Draw a nose from the visual directions
DISCUSSION: The parts of the Mouth
Step by step of the mouth using a mirror
Try each step in sketch book
Shading Techniques
ACTIVITY: Draw second mouth next to first mouth
Draw two eyes, a nose and a mouth on the same plain
Time permitting: add Two ears
CLOSURE: How are you feeling about drawing the mouth? 
                                           Like/dislike/rules/etc.
Teacher Models: 
Step by step of the mouth
Students simultaneously draw a mouth in their sketchbooks
Shading The mouth using mirror and finding highlights and shades
Check for Understanding: 
Monitor room During Step by Step Modeling in sketchbook
Monitor throughout second mouth and partner mouth
Day 5: Power Point Presentation: Facial Proportion
Opening: Think-Pair-Share: facial proportion and features
DISCUSSION: Step by step of how features are placed on the 
Face based on proportion
Step-by step: Adding Hair
Visual Spacial learners: 4 quick visuals on face proportion
ACTIVITY: Students draw and shade a face (Two days)
Teacher Models: 
Step by step facial proportion
Students simultaneously draw proportion rules 
In sketchbooks
Check for Understanding: 
Monitor room During Step by Step Modeling in sketchbook
Monitor throughout second mouth and partner mouth

Day 7: Power Point Presentation: Artist: Frederic Bonin-Pissarro and 
Self-expression
Opening: Before and After: complete a blind contour sketch of the face across from you. Two minutes. 
Compare and contrast to previous Blind Contour face 
Let’s Talk about Art
Discussion on art and critique
Describe
Analyze
interpret
Art History: show work of Camille Pissarro
Impressionism movement
Father of impressionism: Monet? 
Pissarro
Frederic Bonin-Pissarro Portrait
Describe, Analyze, Interpret
Video
Artist Information
Self Expression
Self Portrait
Final Artwork assigned

PROCEDURES: Students complete a self portrait using mirrors, proportion and self expression
Step1: using a mirror and pencil, Draw a self portrait in proportion based on knowledge gained throughout previous discussions and practice. 
Step2: Complete Self Portrait using Oil Pastels and self expression