Saturday, March 13, 2010

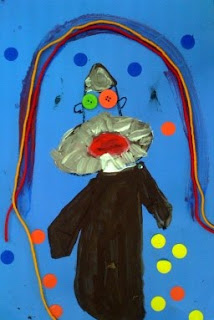
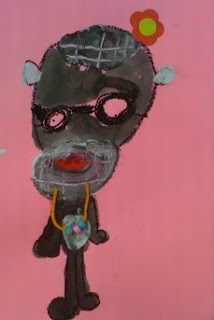
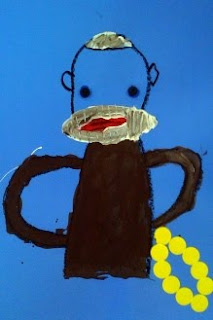
Sock Monkey Paint Weaving


Kindergarten-First Grade

DISCUSSION: weaving as art form
Show examples of weaving in art
Sock Monkey History: John Nelson, a Swedish immigrant to the United States, patented the sock-knitting machine in 1869, and began manufacturing work socks in Rockford, Illinois in 1890.[1] The iconic sock monkeys made from red-heeled socks emerged at the earliest in 1932, the year the Nelson Knitting Company added the trademarked red heel to its product. They were awarded the patent in 1955, and began including the pattern with every pair of socks

ARTIST: Arne Svenson
California-born
New York photographer
He had an obsession with sock monkeys for several years

PROJECT: Step One: Drawing the Monkey
Students should pick a BRIGHT piece of 12x18 construction paper
1 Draw two dots for eyes
2 below the dots draw a large sideways oval
3 draw a smaller oval inside
4 Add a line in the middle for the mouth.
5 Starting at the outside oval on the left hand side, draw a line up and around to the other side of the oval. This will become the head.
6 Draw a curved line at the top of the head for toe reinforcements.
7 Add two ears to the side of the head.
8 Draw a body and skinny arms.

Step Two: Paint Weaving:
Using white tempera paint, paint the mouth and the top of the head with white paint.
Let dry slightly and then paint over the white area with brown or black paint. The paint in this picture looks purple, .
Turn the brush around and with the tip, scratch lines away to create paint weaving.
Tip: Do not let brown paint dry. It's critical that the wet brown paint slide right over the dried white paint. Kids love this part!
Finish painting the body with brown or even gray paint (use the double-load technique with the black and white paint).
Then, use an oil pastel to trace over all painted black lines.

Step Three: Decorate your Sock Monkey
Set out tray fulls of embellishments and demonstrate a few easy ways to decorate the sock monkey. I show options for eyes, show how to cut a piece of paper to fit the head and even make simple pom-poms.

MATERIALS:
12 x 18" colored Tru-Ray Sulphite paper (construction paper)
Black oil pastel
brown, white and red tempera paint
Sequins, buttons, yarn, googlely eyes

Links: For additional information and more GREAT IDEAS!!!! check out http://www.deepspacesparkle.com/

Self Portrait value Collage with Matisse


Sixth-Eighth Grade


PREPARATION: Take a black and white photo of each student. Include only their face.

DISCUSSION: Collage, value, Matisse
Look at one of Matisse's Portraits.
I choose a portrait of his wife: http://www.google.com/imgres?imgurl=http://www.ibiblio.org/wm/paint/auth/matisse/green-stripe/matisse.green-stripe.jpg&imgrefurl=http://www.ibiblio.org/wm/paint/auth/matisse/green-stripe/&h=1034&w=697&sz=162&tbnid=v1w6Xu3jBXlsmM:&tbnh=150&tbnw=101&prev=/images%3Fq%3Dmatisse,%2Bportraits&usg=__OEKtW7IA47DWv3mB_sdbKn5btx0=&ei=0yacS-SkJIHcsgP-6_V9&sa=X&oi=image_result&resnum=3&ct=image&ved=0CAoQ9QEwAg
Discuss expressionism and his use of color
Discuss Value and balance of the piece
Talk about other art history of portraits, Pop Art, Van Gogh
Name careers where you might use portraits

ARTIST:
Henri Matisse 1869-1954French Painter, Studied law until he was 21
Mother gave him a paint box after surgery and he discovered painting
He returned to work, and every morning before work, he attended drawing classes; at lunch time he would paint for an hour or so, and then return to work. After work he would paint till night fell. It was his life.
In 1891 set off for Paris.
Matisse began his journey of studies which ultimately lead him to his love of line, shape and color.
Matisse felt that his greatest influence had been the work of the artist Cezanne (1839 – 1906, French).
In the 1950‘s, Matisse began creating paintings using paint and paper cut outs.
In his last years, as he aged and fell ill, Matisse continued to paint, this time on the walls of his room, using a piece of charcoal attached to the end of a bamboo pole. He painted until his death in 1954.
Matisse had strong feelings about only one thing, the act of painting.
The purpose of these pictures, he always asserted, was to give pleasure.
For Matisse, painting was the rhythmic arrangement of line and color on a flat plane.
He had created the technique of striking contrasts, unmixed hues, flat planes of color (similar to Gauguin, 1848 – 1903, French)
expressive brush strokes (similar to Van Gogh, 1853 – 1890, Dutch).
Light was expressed, not in the method of the Impressionists, but with a harmony of intensely covered surfaces.

For additional information please visit: http://en.wikipedia.org/wiki/Henri_Matiss

PROJECT:
Pass the 8x10 black and white photo to each student
Provide the students with scrap papers in 10 skin color tones
Ask the students to number their scrape paper from 1-10 light to dark
No find the values in your photograph
Create a map on the photo of each value and label it 1-10


example of a face half finished. This still shows the "paint by number" idea.


Begin tearing and place each scrap piece into it's number on the photo
Continue until its complete
My students worked on this project for three weeks

LINKS: This great project was created from several resources for more information please visit: http://www.princetonol.com/groups/iad/lessons/middle/leann-portrait.htm

Drawing M C Escher Tessellations


Sixth-Eighth grade

DISCUSSION: show any of MC ESCHER's art work
Discuss the repetition of images
Discuss the mathmatical aspects of the artwork
get feedback from the students about their feelings on the endless themes

ARTIST: MC ESHER 1898-1972
Dutch graphic artist
Know for his mathematically inspired woodcuts, lithpgraphs, mezzotints
These feature impossible constructions explore infinity, architechture and tessellations
Hand drawing themselves
Circular waterfalls
Very mathematical

A tessellation is created when a shape is repeated over and over again covering a plane without and gaps or overlaps.

PROJECT: EACH STUDENT CREATES THEIR OWN BIRD TEMPLATE USING THE FOLLOWING STEPS:
Step1: 3x3 inch cut tag board card
DRAW A DIAGRAM ON THE BOARD:
Step2: number corners as shown: left top corner 1
Right top corner 2
Left bottom corner 3
Right bottom corner 4
Step3: cut off corners numbered 3 and four diagonally
Step4: tape them to the top touching not overlapping: 3 on top of one creating straight edges
Step5: tape four on top of two creating straight edges
Step6: draw a triangle on the backside as shown, label H
Step7: cut out the triangle and tape it to piece labeled 4 creating a head
http://www.artprojectsforkids.org/2008/02/mc-escher-tessellations.html

Use this bird as a template to fillin your page of construction paper trace the bird over and over again until your page is full of birds

Take your time filling in the birds
Use two complimentary colors
Or Try Black and white
Rainbow palette could also be interesting

MATERIALS:
3x3” tag board
Scissors
Tape
12x18 white construction paper

LINKS: I found this project on another one of my FAVORITE sites. For more information and detailed drawing of bird directions please visit: http://www.artprojectsforkids.org/2008/02/mc-escher-tessellations.html

Wednesday, March 10, 2010

Picasso Cubism Coasters


Preschool-First Grade

Discussion: Cubism/perspective/emotion
What does perspective mean?
How do things look from an airplane?
How does an airplane look from here?
How small are the trees in the park from here? Can they fit in your fingers?
And standing next to them how much could we fit in our fingers? One piece of bark??

PERSPECTIVE: how you see things from where you are
In this classroom: some of you are looking at this half of my face and some at this half
Cubism means to draw things from several perspectives in one space
PICASSO pioneered the idea he is the father of cubism
Picasso would draw one face but show it from profile and forward.

Emotion: how color, music, life make you feel
If you are in a bad mood do you think you would paint the same thing if you were in a good mood?
What about music? If you are listening to your favorite song/artist do you think you would paint the
Same thing as you would if you were listening to your Least favorite?
Picasso included emotion in his pieces deciding on colors and images based upon how he felt in that moment.

ARTIST: Pablo Picasso
(25 October 1881 – 8 April 1973)
He was a Spanish painter, draughtsman, and sculptor.
He is one of the most recognized figures in 20th-century art.
He is best known for co-founding the Cubist movement and for the wide variety of styles embodied in his work. Picasso demonstrated uncanny artistic talent in his early years,
He painted in a realistic manner through his childhood and adolescence;
During the first decade of the twentieth century his style changed as he experimented with different theories, techniques, and ideas.
Picasso’s creativity manifested itself in numerous mediums, including painting, sculpture, drawing, and architecture. His revolutionary artistic accomplishments brought him universal renown and immense fortunes throughout his life, making him the best-known figure in twentieth century art.

PROJECT: create a clay coaster with a Picasso influenced face
Step1: roll your clay out like a snake
Step2: coil it up like a sleeping snake
Step3: begin to flatten it so that the top and bottom are smooth
Step4: once you have a smooth circle begin to add facial features with your toothpick
Step5: add eyes: one forward and one sideways
Step6: add a nose but maybe it is upside down or on the cheek
Step7: add a mouth but maybe it is on the forehead or sideways
Step8: don’t forget hair

MATERIALS:
Clay
toothpicks

Here are additional photos of Picasso coasters from preschoolers that have been glazed and fired

Printmaking Seahorses with Van Gogh


PREPARATION: add a bit of dish soap to all the paint colors. This will help to get it off the students hands.

DISCUSSION: The Seahorse: what do the students already knew about them?
Interesting facts such as: the male sea horse births the babies rather than the female,
A sea horse's eyes move independently so it can hunt with one eye and watch out for enemies with the other.

Texture comes into play as you might reveal a finger or thumbprint as you work on this project and it is a great way to tie in the artist Van Gogh:

ARTIST: Van Gogh
Vincent van Gogh
(30 March 1853 – 29 July 1890)
Dutch Post-Impressionist painter
His work had a far-reaching influence on 20th century art
Known for his vivid colors and emotional impact.
Van Gogh did not begin painting until his late twenties
most of his best-known works were produced during his final two years.
He produced more than 2,000 artworks, consisting of around 900 paintings and 1,100 drawings and sketches.
His work was a strong influence on the Modernist art that followed.
Today many of his pieces—including his numerous self portraits, landscapes, portraits and sunflowers—are among the world's most recognizable and expensive works of art.
Known for his paint application creating texture and movement.
He suffered from anxiety and increasingly frequent bouts of mental illness throughout his life,
died largely unknown, at the age of 37
sold only one painting while he was alive

for additional information, please visit: http://en.wikipedia.org/wiki/Vincent_van_Gogh

Painting with demonstration: Show the Students different techniques using their brushes
Vertical stroke
Horizontal Stroke
Top of the brush
Side of the brush
End of the brush

PRINTMAKING: using hands to make a print today. What does a print mean?
How many prints of our hands could we make?

PROJECT : Brushstroke/hand print Seahorses
Step 1: Students then laid the side of their brushes in yellow then orange or magenta, alternately, and printed three vertical strokes side-by-side for the head.
Step 2: they turned the brush horizontally to create a snout and used the tip of the brush to make two dots for the end of the snout.
Step 3: They continued to make the body, Using their four fingers dipped into the paint they make a print of their hand for the body.
Step 4: The sea horse was finished by making smaller brushstrokes for the curving tail, ending with tiny dots at the end. This technique is very forgiving--it's difficult to make a mistake. Experiment with overlapping strokes for an interesting effect.
Step 5: Dip the tip of the brush in yellow made the perfect big eye.
Step 6: The end of the handle of a brush dipped in green was used to make tiny pupils of the eye, each looking in a different direction.
Step 7: Make seaweed with the one-stroke method, blending yellow and green tempera.
Step 8 if time allows students can paint colorful schools of tropical fish were printed all with a few strokes of the brush.

MATERIALS:
Blue paper
Paint
Water
Soap

Found this great project in the September 2008 issue of Arts and Activities.