Showing posts with label Crocker. Show all posts

Sunday, January 25, 2015

Additive wooden sculpture with Barbara Spring


Lesson Objective 
Work with elements of art: Form, Shape, Color
Work with principles of Art: Balance 
Create a additive wooden sculpture in the style of Barbara Spring

Key Vocabulary: 
Additive: Is the process by which material is shaped and built up to create the desired image.
Achromatic:  Any color that lacks strong chromatic content is said to be unsaturated, achromatic, or near neutral. Pure achromatic colors include black, white and all grays; near neutrals include browns, tans, pastels and darker colors. Near neutrals can be of any hue or lightness.
Color Scheme: color scheme is the choice of colors used in design for a range of media. 
Assemblage: An assemblage is a sculpture constructed from found objects. Typically an assemblage does not disguise the original objects used, rather it either tries to show them in a new light, or forms a figurative sculpture from the collection of shapes.
Materials: 
Variety of wooden sticks
Craft Sticks
Tooth Picks
Coffee Stirrers
Wood chips
Brown craft crinkle
Glue:  white or wood

Focus Artist: 
Barbara Spring
Video for projection presentation: https://www.youtube.com/watch?v=CJcmv-3aUys

Project Requirements
Create a wooden cake in the style of Barbara spring using additive sculpture and assemblage. 

Assessment: 
Informal: Large group Oral Critique
Formal: Artist Statement
Formal: Grading final sculpture

CA STANDARDS: 
1.1 Identify and use the principles of design to discuss, analyze, and write about visual aspects in the environment and in works of art, including their own. 
1.4 Analyze and describe how the composition of a work of art is affected by the use of a particular principle of design.
2.1 Solve a visual arts problem that involves the effective use of the elements of art and the principles of design.
3.3 Identify and describe trends in the visual arts and discuss how the issues of time, place, and cultural influence are reflected in selected works of art.
4.1 Articulate how personal beliefs, cultural traditions, and current social, economic, and political contexts influence the interpretation of the meaning or message in a work of art.
4.5 Employ the conventions of art criticism in writing and speaking about works of art.
5.2 Create a work of art that communicates a cross-cultural or universal theme taken from literature or history.

Modifications: 
English Language Learner: Handout for project, project samples, Power point with visuals, Critique for additional understanding, Demonstration of techniques, group activities to check for understanding
Special Needs: Handout for project, project samples, Power point with visuals, Critique for additional understanding, Demonstration of techniques
Accelerated Learner: Expand on skills learned to create a unique project. 
Advanced art students will be asked to increase the difficulty of their final sculpture They will also be expected incorporate more details and principles into the final project

Scaffolding adaptations: 
Students will revisit Shape, Color and Form from the earlier learning. We will use similar visuals to refresh earlier learning.  Notes on Art history, Key Vocabulary and artists will be taken throughout discussions for added understanding. Creating sketchbook plans and Constructing final sculpture will be demo started in class using guided instruction. 

DIRECT INSTRUCTION:
Art Link: 
Small Group Critique Barbara Spring’s A La Carte 
Describe
Analyze
Interpret
Large Group Critique 
INTRODUCTION: Barbara Spring Video

OBJECTIVE: Create Wooden cake using various wood pieces for structure and decoration
Students will understand new vocabulary as is relates to visual art
Students will discover review the elements of Shape, color and Form. They look at the artwork of Barbara Spring and use additive and assemblage techniques to create cake form with neutral/achromatic color format 
Discussion:
ART HISTORY: Barbara Spring 
Barbara Spring (1916- 2011)  94 years old
An exceptional wood sculptor, 
Barbara Spring's career began in 1935 in her native England 
She studied at the Gravesend School of Art in Kent and the Central School of Art in London. 
Her exhibits in this country span from 1962 to present.
Actively worked at the studio she built in 1972 next to her home in Big Sur. 
"Barbara is Magic.” "She can give an ordinary face so much emotion." says Greg Hawthorne of the Hawthorne Gallery, where much of her work is exhibited. 
She pokes fun at the human frailties of her characters, their pettiness, self-importance and self-doubt
Spring's gentle sense of humor makes them sympathetically engaging. 
Her keen observation of human nature and genius for creating the subtlest nuances are further enhanced by punning titles like "Major Faupar" and "Upton O'Goode".
Watch Video
Key Vocabulary:
Additive: Is the process by which material is shaped and built up to create the desired image.
Achromatic:  Any color that lacks strong chromatic content is said to be unsaturated, achromatic, or near neutral. Pure achromatic colors include black, white and all grays; near neutrals include browns, tans, pastels and darker colors. Near neutrals can be of any hue or lightness.
Color Scheme: color scheme is the choice of colors used in design for a range of media. 
Assemblage: An assemblage is a sculpture constructed from found objects. Typically an assemblage does not disguise the original objects used, rather it either tries to show them in a new light, or forms a figurative sculpture from the collection of shapes.
Teacher Models 
Examples of vocabulary on the board throughout discussion 
Students take notes in their sketchbooks 
Teacher Monitors room throughout discussion
Check for Understanding: 
Monitor room during Pre-assessment in sketchbook
Monitor throughout discussion ensure comprehension and active note taking 
Various Activities Designed to check/enhance student comprehension
Activity: 
Using 24 craft sticks, students build triangle shape for cake base
Using various wood “toppings”
Student decorate the top of the cake using achromatic color palette. 

FINAL PROJECT: 
Rubric Project: Create Wooden cake using various wood pieces for structure and decoration
Students will understand new vocabulary as is relates to visual art
Students will discover review the elements of Shape, color and Form. They look at the artwork of Barbara Spring and use additive and assemblage techniques to create cake form with neutral/achromatic color format 

Students will be assessed on: 
Effort in Class: Studio, Daily Art Link and Discussions 
Additive wood construction precise and cake like. 

Use of a neutral color palette for construction and toppings How sculpture looks from ALL sides

Thursday, June 26, 2014

Value Pulling with Mike Henderson


Mike Henderson, Upstairs (not in crocker) Each way is at Crocker…similar

Recap: Colorwheel
Discussion: 
Value:
How do we make colors lighter?
How do we make colors darker?
What is value?
What is shade? 
What is tint? 
Draw a value scale

Artist: 
Born in the small farming town of Marshall, Missouri, in 1944
Mike Henderson was supposed to work in the local factory with his father. 
His passion for art led him across the country to one of the first integrated art schools in the United States, the San Francisco Art Institute. 
He earned a B.F.A. in 1969 and an M.F.A. in 1970. 
Henderson has been teaching art and art history at the University of California at Davis ever since
He is considered a prominent figure among the second generation of Bay Area abstract painters.

Project: Create a Mike Henderson inspired Value piece by pulling paint

Step1: With the long side of a craft stick, pick up white and any pure color
Step2: Place it on your paper and pull it across to create a new color
Step3: allow the mixing to show, so you get many colors in each pull
Step4: try and create a rectangle with each pull
Step5: repeat the process with each of your pure colors with black and white
Use a paper towel to wipe craft stick between
Step6: feel free to break your stick to get new shapes with your pulls

Materials: 
White paint 
Black Paint
Pure colors of paint, primary and secondary for each student
Pulls: pop sticks, illustration board 
Large Card stock White 


Saturday, April 21, 2012

Pattern Landscapes with Wayne Thiebaud


DISCUSSION: Pattern
What is pattern? 
Where do you find it?
Have we seen pattern in any artwork we have studied?
Discuss landscapes
Horizon line, foreground, background
Do you see pattern?
How many different patterns
ARTIST: Wayne Thiebaud 
(born November 15, 1920) 
He is an American painter 
His most famous works are of cakes, pastries, boots, toys and lipsticks
He is associated with the Pop art movement because of his interest in objects of mass culture,
although his works, executed during the fifties and sixties, slightly predate the works of the classic pop artists. 
Thiebaud uses heavy pigment and exaggerated colors to depict his subjects
well-defined shadows characteristic of advertisements are almost always included in his work.
PROJECT: create a farm landscape with pattern
Step1: with black marker, draw an upside down letter v in the top middle of the paper
Step2: draw two straight lines coming off your V
Step3: draw a line across and then make it into a square down
Step4: add another square in the top and add the letter x
Step5: Add a square inside your square and add two XX’s
Step6: add two window to finish your barn
Step7: draw two lines to either side creating a horizon line
Step8: draw one line down from the barn through the foreground
Step9: draw two diagonal lines from either corner of the barn
Step10: Fill the first open space with clouds (make a pattern, not one cloud, 3 clouds)
Step11: fill the opposite side with trees (Pattern, 3 trees)
Step12: fill the other four open spaces with stripes, polka dots, diagonal lines, squiggly lines, etc...
Step 11: Color in all your pattern with color, remember we want a pattern so stick to two or three colors for each pattern
MATERIALS:
black sharpie markers
all colors of markers


Once these were in my computer, I realized they are a great project to discuss perspective. Many of the children were able to achieve perspective in these drawings without even trying. This is another great discussion point for this project. 

Tuesday, December 6, 2011

Form in Wire with Claire Falkenstein


blue tape on the left side of the picture has the students name for identification for upcoming art show. 


Discussion: Form
What is form? 
How is it different then a painting?
what is space?
Negative space?
Positive space?
Claire Falkenstein, 
Body Centered Cubic
on display at the Crocker Art Museum in Sacramento, CA
Claire Falkenstein (1908-1997) 
American artist and sculptor
Through her long and prolific career, Claire explored every medium, from sculpture, drawings and paintings to prints, wallpaper and jewelry. 
An Oregon native who worked in Paris, France, the San Francisco Bay area and Venice, California. 
Falkenstein is best known for her monumental sculptures as well as her more intimately-scaled prints and jewelry. 
Falkenstein experimented endlessly, learning about metals by melting them in spoons over a kitchen stove. 
Soon, she was manipulating gold, silver, platinum, brass, copper and steel into necklaces, brooches, rings as well as large-scale sculpture.
Working in Italy in the late 1950's, she made one of her great discoveries, devising a way to virtually "fuse" glass and metal—two very different materials in behavior and chemistry—into single pieces. 
This combination of materials became the hallmark of her creative production.
While she was working small, Falkenstein was thinking big. 
Gradually abandoning traditional media like wood and clay, she began producing large-scale sculptures, fountains and other structures using innovative glass and metal techniques first explored in her highly experimental jewelry.

SAFETY discussion is necessary for this project. I gave the students 3 feet of wire. If students are too close together someone could get hurt. If you can not spread students out, coil up the wire while children work and remind them at all times to be safe.
Project: create a small wire sculpture with beads
Step1: know that you must be gentle while working with wire
Step2: decide on a shape, our artist used the shape of a square. YOu finished product should be no bigger then your fist
Step3: as you begin to twist and mold your wire into a shape remember your beads 
Step4: add in all beads into your sculpture 
Step5: add in a small colored wire as your last step
Materials:
Beads
Wire 3 feet, Dick Blick wire for students. 
1 Twistezze per child, Dick Blick


Wednesday, November 30, 2011

Sculpture with Bean Finneran


Discussion:
Form
Space
Monochromatic
Artist and 20,000 curves
20,000 turquoise curves
Bean Finneran
On display at Crocker Art Museum, Sacramento, CA
Artist: Bean Finneran (1971-     )
Cleveland Born
Career beginnings in avant-garde theater in Boston
Designed Jewelry in San Francisco
returned to painting 
eventually began to roll and stack clay
Project: Create a sculpture piece inspired by this work of art
Step1: start with a styrofoam florist cone. 
Step2: cut chenille stems in half or close to half
Step3: add a bead on the end of each half and bend the stem so the bead does not fall off
Step4: place the 1/2 pipe cleaner in the cone
Step5: continue working on this project until you have it completed and are happy with the results
Note: Students will study monochromatic color schemes, pipe cleaners will be displayed by color but if a student wants to use multi colored pipe cleaners they will not be discouraged. 
MATERIALS: 
One styrofoam florist cone per student
Multi-colored beads for the ends   http://www.dickblick.com/products/pony-beads/


Monday, October 31, 2011

Scale Value Fish with Matt Duffin


Discussion: 
Scale: big and little
What colors has he chosen?
Value chart? what is value?
How do we make colors lighter?
How do we make them darker?
Lines: what lines do we see, what lines can you think of?
Look at Matt Duffin's, Crowd Control, 2006 on display at Crocker Art Museum, Sacramento, CA
Does this painting remind you of a scene in the Wizard of Oz?
What is happening behind the curtain?
Why donkeys? are they smart?
What are they standing?
What is the artist trying to say?


ARTIST: Matt Duffin (1968-)
He grew up in Houston, Texas. 
He received his Bachelor of Science in Architecture from the University of Houston. 
He never practiced as an architect, choosing instead to become an artist. Through art, he found that he could easily combine his tendency toward right angles and persecutive drawing with the more human themes of solitude and irony. 
Over time, his medium has evolved from charcoal to encaustic wax, but he continues to dwell in the realm of dark recesses and stark contrasts. 
PRACTICE: on practice paper try drawing fish. 
First reduce them down to two shapes: triangle, oval
Second: add details: fins, gils, scales, tail lines, 
Now try drawing a very large fish almost the size of your paper
use the same techniques and details but make this fish have its mouth open
remember this is just practice drawing shapes, line and details.
Project: Big Mouth Fish
Step1: using a pencil draw a school of fish, at least 12, all the same on one half of your paper
Step2: On the other half draw a large fish mouth, from the side, big enough to eat the whole school.
Step3: using only black and white paint create 5 shades of grey
Step4: paint in your fish fight drawing using only grey paint.
Step5: using all your light shades of grey add in bubbles around the fish using different sized circles use straws, toothpicks, and bottle caps for the large fish. 
Materials:
12x18 thick white paper
Tempura Black and white paint
Bowls or small cups to make new colors
straws


Thursday, October 20, 2011

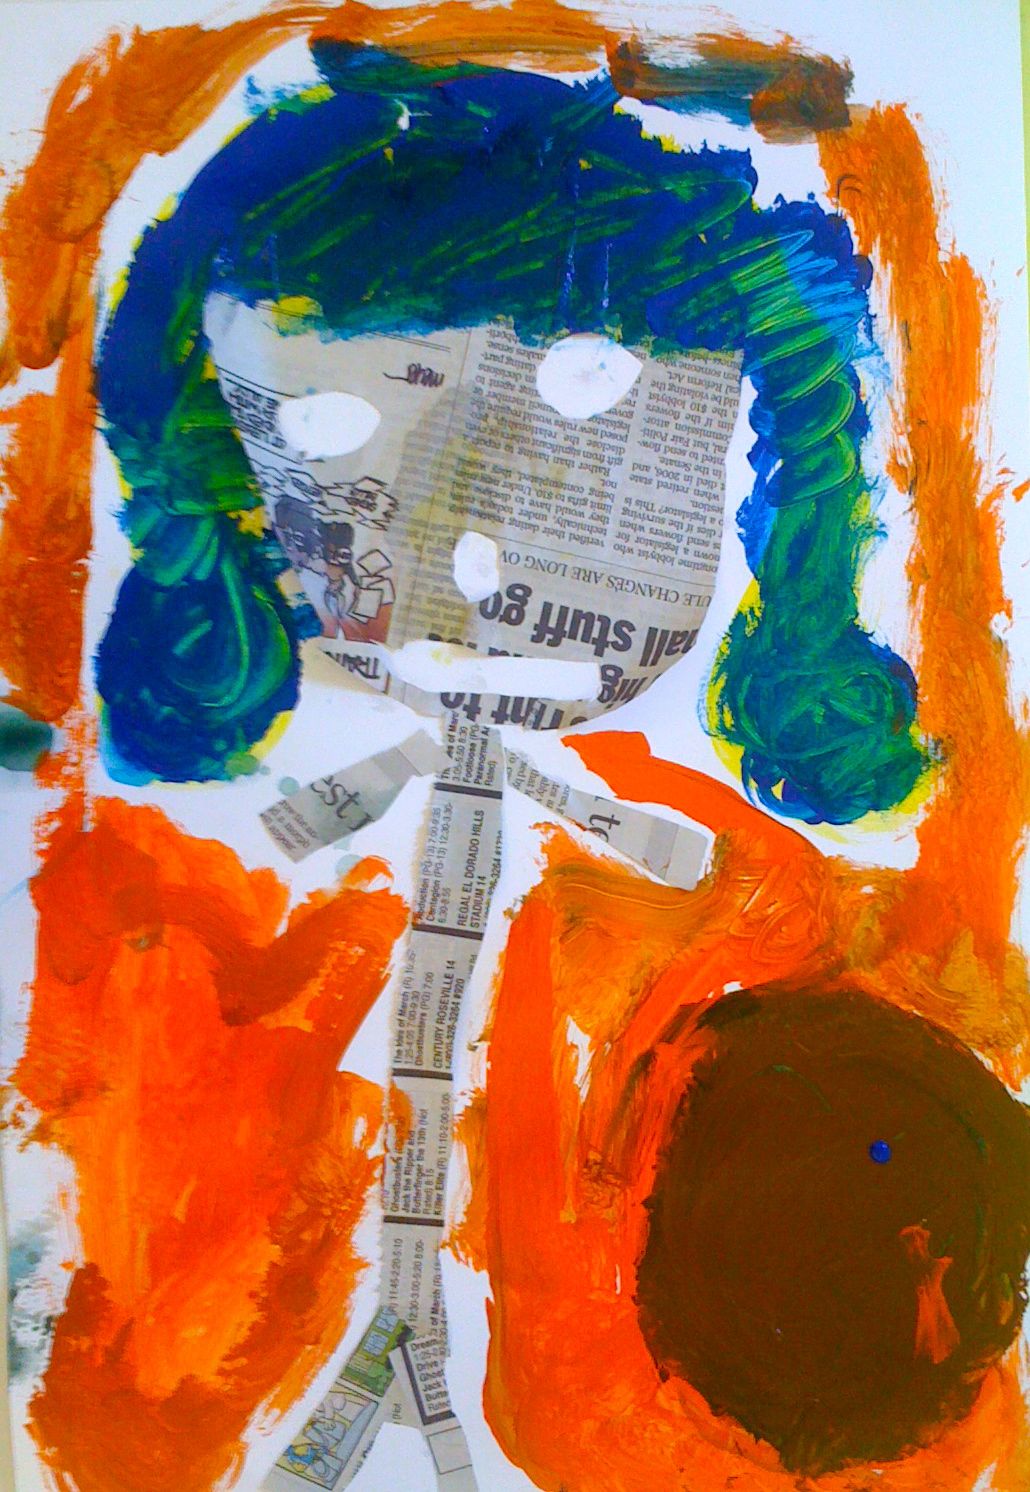
Facial Proportion with Romare Bearden


Discussion
Facial Proportion
Colors
warm and cool colors
complementary colors
neutral colors
Shape
collage
artist, Romare Bearden

His piece Mother and Child, 1968
on display at the Crocker Art Museum, Sacramento, CA

ARTIST: Romare Bearden, (1911-1988)
American, Collage 
  • Born in Charlotte, North Carolina, and died in New York City at the age of 76. 
  • His life and art are marked by exceptional talent, encompassing a broad range of intellectual and scholarly interests, including music, performing arts, history, literature and world art. 
  • Bearden was also a celebrated humanist, as demonstrated by his lifelong support of young, emerging artists.
  • Recognized as one of the most creative and original visual artists of the twentieth century
  • He experimented with many different mediums and artistic styles, but is best known for his richly textured collages, two of which appeared on the covers of Fortune and Time magazines, in 1968. 
  • An innovative artist with diverse interests, Bearden also designed costumes and sets for the Alvin Ailey American Dance Theater, and programs, sets and designs for Nanette Bearden's Contemporary Dance Theatre.
Facial Proportion: The face extends from the top of the head to your chin
This puts your eyes right in the Center of your face
The bottom of your nose falls in the Center of your eyes and chin
Your mouth is in the Center between your bottom of the nose and your chin
Let’s try this with newspaper
Step1: cut out a circle roughly the size of your hand from newspaper
Step2: fold your circle in half and cut out two ovals (eyes)
Step 3: fold your “chin” to your eye fold
Step 4: cut out a small triangle or circle
Step5: fold your “chin” to your nose fold
Step6: cut out a long oval for a mouth shape
Project: 
Step1: glue down your newspaper face to the card stock on the top and slightly right
Step2: Cut out a strip of newspaper and glue it along the bottom of your page
Step3: using yellow add some hair. This could be thickly applied
Step4: using your first complementary color add shape somewhere on your page
Step5: using the second complementary color fill in the background
  • first: go around the shape
  • second: paint over the newspaper strip but make sure you can see some of the newspaper through the paint
  • third: fill the page with the color

Step6: mix your two complementary colors on your plate
Step7: somewhere on your painting add a neutral shape
Materials: 
paint in complementary colors
newspaper
glue sticks
Scissors
paper plates or trays for paint
paint brushes
water