Showing posts with label foam core. Show all posts

Friday, April 17, 2015

Wire Balance Sculptures with Calder


OBJECTIVE: Students will observe and create kinetic balance in artwork. After studying the artist Calder, Students will Plan and create a wire and foam core sculpture in perfect balance 

INTRODUCTION: (Anticipatory set): 
Art Link: 
Think, Pair, Share on balance 
In your sketchbook: draw an example of balance in nature (organic balance) 
How have we used Balance in our artwork to date 

KEY VOCABULARY: Mobile, Armature, Stable, Kinetic Movement, Actual Movement, Balance and emphasis

MATERIALS: 
14 gauge wire (Dick Blick)
7x11 piece of Foam Core
1 Large Rock: Lowes Large Beach rock $10 a bag
Blue, Red, White, Black, and Yellow Acrylic Paint. 

Artists/Art History: Alexander Calder  (1898 – 1976)
Expressionist Movement 
Studied mechanical engineering
Famous for inventing the mobile
Alexander Calder also created paintings, lithographs, toys, tapestry and jewelry.
1930's and 1940's trace the sculptor's early roots in Surrealism. 
Random and spontaneous expression was emphasized as a way to release the subconscious impulse into art. 
Calder used continuous line drawing which he adapted to his innovative wire sculptures such as "Goldfish Bowl”

Project Requirements: 
Plan and create balance sculpture with actual movement in the style of Calder
Sketchbook: 
Plan design of the sculpture. Consider: 
Wire structure
Color
Shape
Balance
Final Project
Stable is balanced and well structured
Shape Disks are in the style of Calder and well painted
No paint strokes present, shape disks, and rock
The sculpture is balanced from all sides
The sculpture has detail and precision (stable, wire, paint, balance)
The sculpture has actual kinetic movement

Assessment: 
Informal: Small group written critique
Formal: Artist Statement
Formal: Grading final sculpture

CA STANDARDS: 
  • Prof.VA:Cr3.1: Apply relevant criteria from traditional and contemporary cultural contexts to examine, reflect on, and plan revisions for works of art and design in progress.
  • Prof.VA:Pr5: Analyze and evaluate the reasons and ways an exhibition is presented.
  • Prof.VA:Re7.1: Hypothesize ways in which art influences perception and understanding of human experiences.
  • Prof.VA:Re8: Interpret an artwork or collection of works, supported by relevant and sufficient evidence found in the work and its various contexts.

Modifications: 
English Language Learner: Handout for project, project samples, Power point with visuals, Critique for additional understanding, Demonstration of techniques, group activities to check for understanding
Special Needs: Handout for project, project samples, Power point with visuals, Critique for additional understanding, Demonstration of techniques
Accelerated Learner: Expand on skills learned to create a unique project. 
Advanced art students will be asked to increase the difficulty of their final sculpture They will also be expected incorporate more details and principles into the final project

Scaffolding adaptations: 
Students will revisit Balance and emphasis from previous learning. We will use similar visuals to refresh earlier learning.  Notes on Art history, Key Vocabulary and artists will be taken throughout discussions for added understanding. Creating sketchbook plans and Constructing final sculpture will be demo started in class using guided instruction. 

INSTRUCTION: 
Students will receive details about Calder, Balance, Stables and Mobiles

DIRECT INSTRUCTION:
Day 1: PowerPoint Presentation Op Art
Opening: Art Link: Balance
Draw a picture of balance in Nature 
Draw a second example of balance using shape and line
How have we used balance in class to date
Critique: Describe, analyze, interpret
Discussion: Alexander Calder & Impact on culture
ART HISTORY: 
The mobile is a kinetic sculpture delicately balanced or suspended components with actual movement
Kinetic: moving parts, depends on motions for the effect
Powered by
Wind
Motor
Viewer
Indirect Instruction
Video of the circus
Describe what you saw. 
What thoughts do you have on this artwork?
Given the opportunity, what aspect of the circus would you want to interact with directly? 
How does this work relate to Calder’s Mobiles? 
Teacher Models: 
Movement and Art History
Students take notes in their sketchbooks 
Teacher Monitors throughout the discussion
DIRECT INSTRUCTION:
Alexander Calder  (1898 – 1976)
Expressionist movement
Studied mechanical engineering
Famous for inventing the mobile 
He also created paintings, lithographs, toys and jewelry
Calder’s stationary sculptures are called stabiles
1930's and 1940's trace the sculptor's early roots in Surrealism. 
Random and spontaneous expression was emphasized as a way to release the subconscious impulse into art. 
Calder used continuous line drawing which he adapted to his innovative wire sculptures such as "Goldfish Bowl.” 

Balance gives viewers the feeling that all parts of the work are in equilibrium  
All paintings and sculptures in galleries and museums are balanced in some way.  
Two basic forms of balance 
symmetrical 
asymmetrical
Symmetrical
To determine the basic balance of an artwork, draw an imaginary line down the center
If what happens on one side generally happens on the other, we say the work is symmetrical.  
The illustration above simplifies symmetry’s basic organization.
Asymmetrical balance will also give a sense of equilibrium
The organization is more complex.  
Just as you and your heavier seesaw partner had to figure out how to arrange yourselves on the seesaw
The artist must play with the specific elements to bring them into balance.
Check for Understanding: 
Monitor room during Pre-assessment in a sketchbook
Monitor throughout the discussion to be sure notes are being taken 
Presentation assessment

FINAL PROJECT: Students will Plan and create a wire and foam core sculpture in perfect balance 

Day 2: Art Link 
Quiet writing in a sketchbook
Calder: What did he invent?
Why was he dissatisfied as an artist early in his career?
Name and describe one activity from the video?
What makes his sculptures special?
Sketchbook Planning
Students receive handouts on Calder and Rock
Students plan their wire sculptures
Plan Shapes
Plan Balance

Day 3: Sketchbook Planning 
Once approved
Student will receive 
Rocks
Wire
Foam Core 
Studio: Begin to construct sculptures

Day 4: Art Link: http://whitney.org/WatchAndListen/Artists?play_id=856
Take notes for artist statement
important to note how the circus influences his body of work

Studio: Continue to Balance 


Wednesday, December 31, 2014

Slotted Color Sculptures with Josef Albers


Lesson Objective
Work with elements of art: Color 
Work with principles of Art: Scale 
Create a Slotted color sculpture exploring color relationships 

Key Vocabulary: 
Hue
Value
Intensity
Chroma
Saturation
Contrast 
Complementary Colors
Simultaneous Contrast 
Successive Contrast 
Color Schemes (relationships)

Materials: 
Foam Core 
Paint
Exato Knives

Focus Artists: 
Josef Albers 

Beg: Project Requirements: Create a Slotted color sculpture exploring color relationships 
Sketchbook: Students will draw color plans for each side of their slotted sculpture and
submit plans for approval. Required: 
Square slotted format for each side (Construction)
Color Relationships (5 different schemes minimum)
Color Placement (Neighbors/Scale)
All sides and angles of the sculpture (Details)
Scale as it pertains to final look of sculpture
Create Free-standing Slotted Sculpture exploring Josef Albers studies on color
Precision (Painting and Slot Construction)
Scale (How color looks from ALL sides)

Adv: Project Requirements: Create a Slotted color sculpture exploring color relationships 
Sketchbook: Students will draw color plans for each side of their slotted sculpture and submit plans for approval. Required:
Slotted, one shape format for each side (Construction)
Color Relationships (8 different schemes, minimum)
Color Placement (Neighbors)
All sides and angles of the sculpture (Details)
Scale as it pertains to final look of sculpture
Create Free-standing Slotted Sculpture exploring Josef Albers color studies 
Precision (Painting and Slot Construction)
Scale (How color looks from ALL sides)

Assessment: 
Informal: Written Peer Critique
Formal: Artist Statement
Formal: Grading final sculpture

CA STANDARDS: 
1.1 Identify and use the principles of design to discuss, analyze, and write about visual aspects in the environment and in works of art, including their own. 
1.3 Research and analyze the work of an artist and write about the artist's distinctive style and its contribution to the meaning of the work.
1.5 Analyze the material used by a given artist and describe how its use influences the meaning of the work.
2.2 Plan and create works of art that reflect complex ideas, such as distortion, color theory, arbitrary color, scale, expressive content, and real versus virtual. 
4.5 Employ the conventions of art criticism in writing and speaking about works of art.
5.2 Compare and contrast works of art, beyond the obvious and identifying psychological content found in the images

Modifications: 
English Language Learner: Handout for project, project samples, Power point with visuals, Critique for additional understanding, Demonstration of techniques
Special Needs: Handout for project, project samples, Power point with visuals, Critique for additional understanding, Demonstration of techniques
Accelerated Learner: Expand on skills learned to create a unique project. 
Advanced art students will be asked to increase the difficulty of their final sculpture They will also be expected incorporate 8 color schemes in final sculpture. 

Scaffolding adaptations: 
Students will revisit color and line from the earlier learning. We will use similar visuals to refresh earlier learning.  Notes on color, scale and artists will be taken throughout discussions for added understanding. Creating sketchbook plans and Constructing final sculpture will be demo started in class using guided instruction. 

Art Link: 
Science and Art
How have we used science in the course already? 

INTRODUCTION to lesson (Anticipatory set): 
Watch a video on Josef Albers and his work 
Use discussion form to enhance learning

OBJECTIVE: Using Slotted Sculpture as your 3-D Form 
Create Free-Standing Artwork exploring 6 different color Schemes/Relationships
Must Complete Sculpture from all Angles
Discuss Science and Art as pre-assessment
Discuss and practice drawing your final project on paper
Work closely with teacher before moving to foam core
Students will understand new vocabulary as is relates to visual art: 
PURPOSE: Complete Free-Standing, Slotted sculpture exploring color relationships. 

INSTRUCTION: 
Students will discover review the elements of color and Scale. they look at the artwork of Josef Calder and create a Slotted sculpture piece as a final art project. 

DIRECT INSTRUCTION:
Day 1 and 2: Power Point Presentation Color and Albers
Pre-assessment: Science and Art
Opening: Art Link: Quote from Albers on Science and Art
Review: Elements of art 
Discussion: Color
Key Vocabulary featured on PPT with visuals: 
Hue
Value
Intensity
Chroma
Saturation
Contrast 
Complementary Colors
Simultaneous Contrast 
Successive Contrast 
Color Schemes (relationships)

ART HISTORY: Josef Albers 
German-born American artist and educator 
He worked, both in Europe and in the United States
Taught at Yale University
He formed the basis for the most influential and far-reaching art education programs of the 20th century.
Studied color with paper
Avoids mixing paint
Saves time and materials
Gain active interest, no prep
Precision of tone, light and surface quality
No texture (i.e. brush strokes)
Huedoku: Students play the app Huedoku to see their learning at work. The app is created from Albers studies and allows students to place colors in the right order based on hue. Students will both watch and play. Student playing will be active in color placement students watching will observe how color changes based on its neighbors. 
Review each Color scheme on last slide to check for understanding 
Teacher Models: 
Color throughout discussion 
Students take notes in their sketchbooks 
Teacher Monitors throughout discussion
The game Huedoku on how to play with three color boxes 
Check for Understanding: 
Monitor room during Pre-assessment in sketchbook
Monitor throughout discussion ensure comprehension and active note taking 
Students play the Huedoku App with 4 color boxes and higher

Present Rubric through Power Point Slides: 
FINAL PROJECT:  Using color relationships considering colors will be placed next to each other on final sculpture 
Students will draw  plans for their Color sculpture before moving to paint stage
They must consider:
Color Relationships
Color Placement
All sides and angles of the sculpture
Scale as it pertains to final look of color on sculpture
Create Free-standing Slotted Sculpture exploring Josef Albers studies on color

Day 3: Students receive a full day to create and label their five color schemes 
Students show me their color schemes to show understanding and receive foam core
Day 4: Students measure and cut slots based on model I presented or their own ideas. 
Student will use exact knives to achieve slot cuts
Safety Measures in place: 
Watch a video about how to cut slots on youtube
Teacher passes out and retrieves exacto knives 
Students must have a partner also ready to make cuts before receiving 
exacto knife
Students are reminded about keeping thumbs in and watching partners
throughout exacto use
Teacher monitors exacto knives by observing each table throughout 
class time. 
Day 5: Slot Cutting Continues
Day 6: Students begin paint planning
Once slots are in place and structure is complete
Students will begin to add paint lines and details on the final sculpture
This planning will help complete painting of each color scheme
Paint is applied in the style of Josef Albers Squares
Day 7: Painting Continues
Albers Reflection through Art Link (15 Minutes)
Students read a quote from Josef Albers
They are reminded about how we got to this stage of our sculpture
They are asked to read through their notes and find their favorite fact as a table 
group
They discuss and expand on the fact and present their discussion to the class
This will prepare students for upcoming Critique
Students are asked to take notes on this process for Friday sketchbook checks
Students return to their stage of the sculpture 
Day 8: Full studio Day
All students should begin the painting Process today
Check the room for students who are lingering in the slot phase or color 
planning phase
Day 9: Critiques: 
Peer Critiques
Directions: Present to the class first by Power Point
Show the rubric on Power Point 
Review Rubric Goals
Remind students to critique by rubric
Students can partner with anyone in the room but a table mate
Students will exchange sculptures 
Each student will create a written critique about their partners work
Each student should address goals achieved and goal 
opportunities
Students should use the name Albers at least once
Students should refer to a Rubric Goal at least twice
Students should incorporate key vocabulary throughout. 
Critique is based on Rubric Goals
Students will exchange their written critiques
Read and discuss new goals with their partner
Day 10: Full studio Day 
Focus on New Goals from yesterday critique
Focus on getting to the halfway mark of your painting process
Day 11: Full studio Day 
All should be at the 3/4 way mark by the end of the day 
Day 12: Final day of sculpture (November 10)
Students should complete sculpture today and be ready for Artist Statement 
Turn in completed sculptures at the end of the period. 


Day 13: Artist Statement (November 12)


Tuesday, September 21, 2010

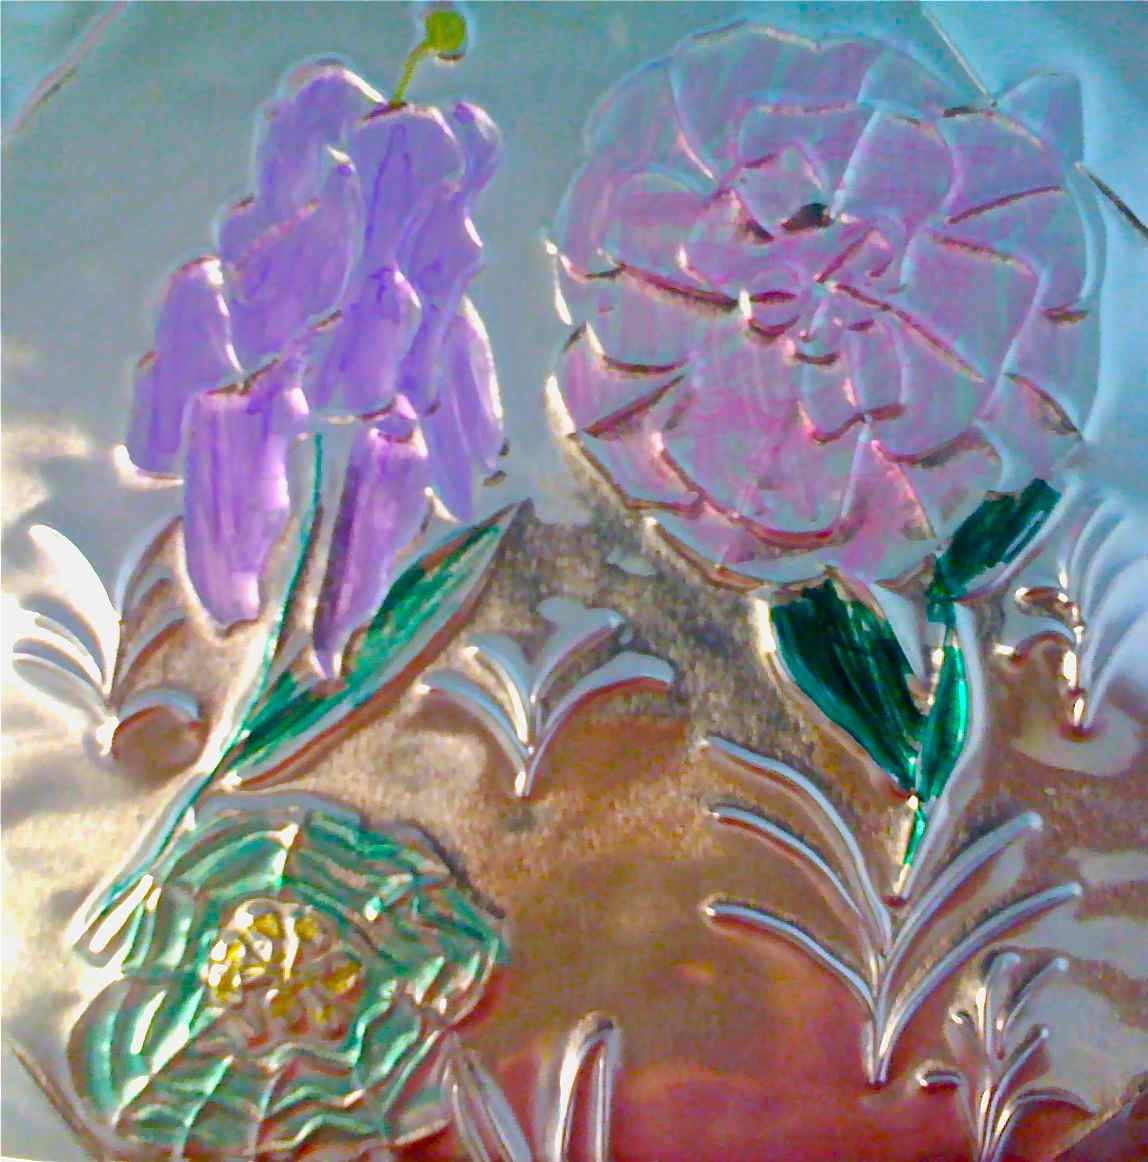
Repousse' sculpture with Georgia O'Keeffe


PREPARATION: cut foil, drawing paper and foam core to the same size before class begins. 6"x6" squares are ideal for this project.

Discussion: Form 
Form: to give shape to a thing or person
Sculpture
What is sculpture made from? wood, metal, plaster, wax, 
Repousse’: a metalworking technique in which a malleable metal is ornamented or shaped by hammering from the reverse side
The word repoussé is French and means "pushed up", 
Repoussage is actually the correct noun to refer to the technique, with repoussé
being an adjective referring to a piece to which the technique has been applied
English it has become common to use repoussé as a noun, and this usage is reflected in this article.
Most Famous Sculpture done with this technique? Statue of Liberty in New York
ARTIST: Georgia O’Keeffe 
(November 15, 1887 – March 6, 1986) 
O'Keeffe was a major figure in American art from the 1920s. 
She received widespread recognition for her technical contributions, as well as for challenging the boundaries of modern American artistic style. 
She is known for paintings of flowers, animal bones, and landscapes in which she synthesized abstraction and representation.
O'Keeffe played a central role in bringing an American art style to Europe at a time when the majority of influence flowed in the opposite direction. 
This feat enhanced her art-historical importance given that she was one of few women to have gained entry to this level of professional influence. 
She found artistic inspiration in the rural Southwest, particularly in New Mexico, where she settled late in life
Project: Create O’Keeffe Flowers as relief sculpture on tooling foil 9:30-10:30
Step 1: On paper, Using one minute  Blind Contour, practice drawing the group of flowers     Repeat 3-5 times
Step2: pick your favorite drawing of all the flowers or one flower
Step3: Tape drawing to 6" square of tooling foil (aluminum, copper or brass).
Step 4: Lay on pad of newspaper (or foam pads, if available).
Step 5: Trace over all lines with a ball point pen or popsicle stick - Remove drawing from foil.
Step 6: The Tool flower is in relief from back side - repoussee.
Step 7: Turn back over to front side and refine edges of flower.
Step 8: Add any textural effects desired.
Step 9: Color with permanent markers.
Step 10: adhere to same size cardboard or foam core
Materials:
Flowers or silk flowers. 
Square paper for blind contour drawings
Square tooling foil (or any desired size). 
Masking tape
Ball point pens or Popsicle sticks
Newspaper pads 
Permanent markers
Foam Core cut to the same size as the foil 6"x6" squares are ideal

Saturday, April 17, 2010

Nature textures with Gerhard Richter


Kindergarten-Second Grade

PREPARATION: thicken blue and green paint with flour

DISCUSSION:
Show several of Richter’s Abstract Art work
What do you see?
Does it look like a photograph? It is an Abstract
What does it make you think of?
Water reflections
Tree bark
Evoke textures of natural objects: reflections, shadows
What tools do painters use?
Canvas, brush paint
Where do you see layers of paint?
What order do you think he painted them in?
How do you think he created these effects
Layers of paint scraped with a squeegee
Can an artist start a painting without knowing what they are going to create?

ARTIST:
Gerhard Richter (born February 9, 1932)
German visual artist.
Known for his blurred painting of photographs
Known for abstract paintings of pulled paint

PROJECT: Create a Richter inspired piece of art on Foam Core
Step1: using a sponge paint on your foam core using warm colors provided
Step2: Turn in sponges
Step3: gather painting materials: card board cut in small pieces , plastic forks
Popsicle sticks, etc.
Step4: using thickened greens and blues apply paint with cardboard squeegees
Step5: using forks and sticks scrape into the paint reveling the warm tones underneath
Step6: look at your work and see if you can find a texture that you see in nature.

MATERIALS:
Thicken blue and green paints
Warm Paints
Cardboard squeegees
Plastic forks and sticks
Foam core
Sponges

Adaptations: this project would be a great one for warm and cool color exploration.

This project was a really great way to expand the kids ideas about different ways we can create artwork. It was so much fun to experiment with different painting utensils. The kids had a blast and the results were amazing!!! Thanks to my friend Kerry for such a great lesson plan!!!