Showing posts with label monoprints. Show all posts

Tuesday, July 24, 2012

Texture Printmaking with Wayne Thiebaud


Discussion: 
What is texture? 
How does your hair feel?
How does the bottom of your show feel?
Do they feel the same?
What about tree bark vs. A puppy? 
Art and texture: 
The job of an artist is to create visual texture
A dog might look fluffy and a marble would be shiny and smooth
Printmaking: do you print things at home? 
How do you print them?
How do we print in art: smash pictures or folding pictures in half
There are many techniques in art for printmaking
Mono-print: creating one print from an original piece of art
Look at Wayne Thiebaud’s Gum ball machine painting and discuss how he might have drawn it. 
ARTIST: Wayne Thiebaud 
(born November 15, 1920) 
He is an American painter 
His most famous works are of cakes, pastries, boots, toys and lipsticks
He is associated with the Pop art movement because of his interest in objects of mass culture,
although his works, executed during the fifties and sixties, slightly predate the works of the classic pop artists. 
Thiebaud uses heavy pigment and exaggerated colors to depict his subjects
well-defined shadows characteristic of advertisements are almost always included in his work.
Project: Create mono-print gum ball machine from sand paper
Step1: on your 4x6 piece of sand paper: with a black oil pastel, draw a large circle on the top half
Step2: Draw a square underneath your circle
Step3: add a half circle on top of your first circle
Step4: add a small circle inside your square
Step5: color in your square and small half circle with the same color
Step6: color in your small circle black to show where the gum balls come out
Step7: fill your machine with different colored gum balls
Step8: once complete, adult uses an iron to melt picture onto your tag board paper
Note: These come out like a print, they might not be exact. 
MATERIALS: 
Oil pastels
Sand paper (light)
Iron
Heavy card stock or tag board paper


I loved the addition of the 25 cents but you might warn young students that it will print backwards. 

Saturday, June 18, 2011

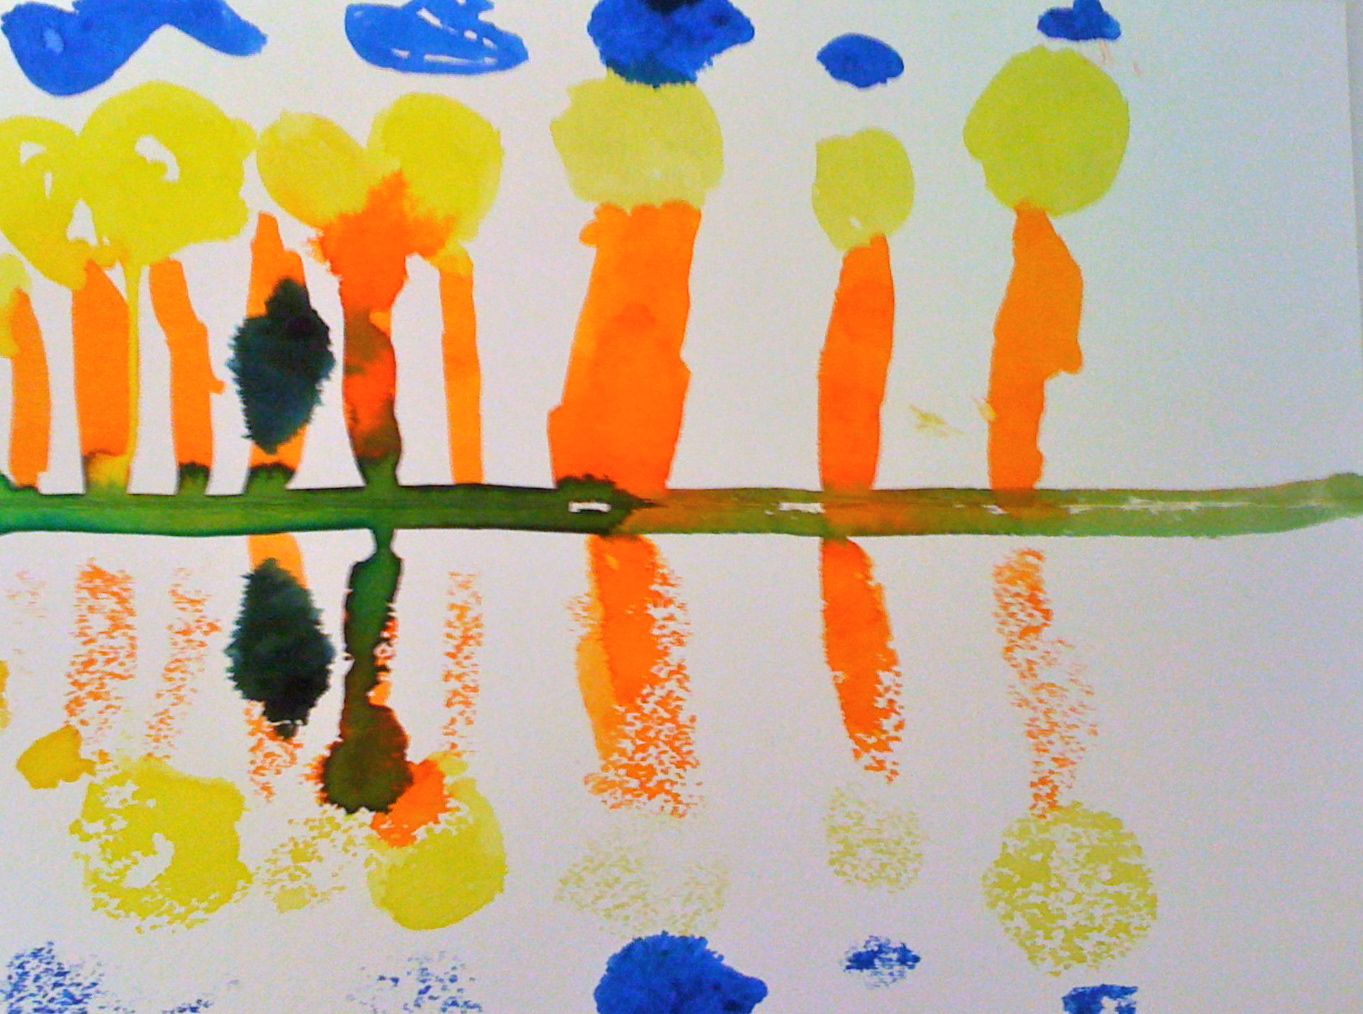
Monoprint Reflection landscapes with Gregory Kondos


DISCUSSION:
Landscapes from a new perspective
Artist and the artwork: Sacramento River, 1981 Crocker Art Museum, Sacramento, CA
Washes
graded washes
centered horizon lines
reflective water
monochromatic
value
Mono prints

Artist: Gregory Kondos
1923-
Painter Gregory Kondos executes thickly painted landscapes known for their buttery spread of bright, warm color. Even the cool tones of the color blue in a Kondos painting are heated, evoking sun-warmed expanses of summer sky and waters. Perhaps this is because of the intense light that drenches the Sacramento and Napa Valleys that he likes to depict. Heat also plays a role, causing the regional landscape to shimmer in a veil of heavy air that mutes the intensity of color and broadly flattens detail. This, of course, is common in Sacramento, home to the artist, where he has painted and taught for half a century. 
In his use of high-keyed color and broad paint handling Kondos shows an affinity to artists such as Wayne Thiebaud, with whom he shares an abiding friendship, Roland Petersen, and Bay Area artist Raimonds Staprans. Unique to Kondos, however, is his verity to subject. Arguably, Petersen and Staprans overtly generalize the landscape, while Thiebaud’s landscape forays are about pattern and its role in establishing illusion. Kondos’s compositions are balanced in order to express not only the tranquility of the scene, but also the pleasure of solitary communion with nature. The artist offers, “If you look at my work, you will find qualities of quietness and cleanliness, but, above all, you’ll find that I’m a loner.” 
PROJECT: 
create a reflective landscape using the mono print method
Step1: Fold your paper in half horizontally
Step2: Using liquid watercolor Paint a tree trunk
Step3: fold your paper to print the tree trunk
Step4: continue painting and printing tree trunks until you have 3-7 trees
Step5: add a tree top on one of your trunks, fold and print your tree tops
Step6: continue until all of your trees have tops
Step7: add land under your trees, grass or hills, etc. and fold your paper to print them 
Step8: add your sky behind the trees, remember to print them before they dry you might print several times during teh painting process
Last: using wet brush with clear water pull the reflection slightly to give it a more real reflective quality
MATERIALS: 
watercolor paper
watercolors