Saturday, June 18, 2011

American Impressionist landscape with Birger Sandzen


Discussion: 
Birger Sandzen and the artwork
PINES AND ASPEN, ROCKY MOUNTAIN NATIONAL PARK, COLORADO, 1929, crocker Art Museum, Sacramento, CA
Impressionism
Pointillism
light values 
stencils
matisse method of painting with scissors for stencils
pollack method of spraying paint (we will use toothbrushes)

Artist: Birger Sandzen  (5 February 1871–19 June 1954), 
he was a Swedish-American painter best known for his landscapes. 
He produced most of his work while working as an art professor at the Bethany College, Lindsborg, Kansas.[1]
A painter and printmaker, Birger Sandzén was one of the first European-trained, avant-garde artists to settle in the American heartland. 
Born in the village of Blidsberg, Sweden 
Took classes with the internationally known Swedish Impressionist painter and etcher Anders Zorn. 
In 1894, he moved to Paris to attend a painting class by Edmond François Aman-Jean and encountered firsthand the Pointillism of Georges Seurat. 
Sandzén was drawn to Kansas to teach at Bethany College
He immediately assumed a leading role in the cultural life of the Midwest, exerting enormous influence upon the development of art in Kansas and surrounding states. 
He traveled to find his subjects, not just in Kansas but extensively in the desert Southwest and Rocky Mountains of Colorado. 
This painting of Rocky Mountain National Park is a scene that the artist depicted often. 
As in much of Sandzén’s production, the subject matter of rocks, water, and trees is secondary to the artist’s expressive color and application of pigment. 
With thick areas of impasto and brushwork left evident, highkeyed colors exist side by side in full intensity, mixing optically to produce an expressive surface that celebrates both the topography depicted and the art of painting.

PROJECT: students create pointillism landscape using stencils tape resist and toothbrushes
picture landscape in your mind: trees in middle ground, mountains behind, pond in foreground
Step1: in the middle ground draw a rock shape
Step2: in the foreground draw a pond
Step3: using blue tape tear and place in your tree onto your rock in the middle ground
Step4: using poster board cut a mountain range
Step3: place mountain range on to your paper protecting all below
                tape down your painting and the mountain stencil so that they won't move during the 
                splattering
Step4: using a toothbrush and scissors spray in your sky in teh background
Step4: remove mountains paint in mountains and middle ground using the side of your medium brush like oval dots
Step5: paint in your pond using the tip of a q-tip small round dots
Step6: remove your tape from the trees using the side of your small brush add in black side brush ovals creating a birch tree
Step7: using the small point dot of the tip of your paint brush add in the leaves of the tree.
MATERIALS: 
watercolor paper and paints
q-tips
blue tape
poster board
card stock or poster board for mountain stencils


Woven Value Seascapes with Si-Chen Yuan


DISCUSSION: 
Artist and the artwork: 


Si-Chan Yuan

BEACH, MONTEREY, CA. 1968-1974, Crocker Art Museum, Sacramento, CA

seascapes, sand in foreground, water in middle ground, sky in background
linear horizon
wash with texture Burlap pieces to give sand like quality
drawing with pencil
wash in water several blue values
Greyscale

Artist: Si-Chen Yuan (1911-   )
Born in Hangchow, China, Si-Chen Yuan studied at the Fine Arts Academy in Nanking, 
He practiced Western styles and worked in oil paint—as opposed to traditional ink painting. By the time of his graduation, China was in turmoil, caught between nationalist and communist politics. 
For a time, Yuan worked as an artist producing political propaganda for the Nationalist party. But, when the Communist party gained control in 1949, he left China. 
The following year he became a United States citizen. 
Yuan was seduced by Monterey’s dramatic coast and moved there in 1951. 
He married in 1953,  
In addition to portraits of family and friends, Yuan painted a range of subject matter, including still lifes, landscapes, and seascapes, and he experimented with non-representational abstraction. 
He painted swiftly and energetically, as friends recall, using broad strokes to rapidly render his subjects. 
He delighted in the interplay of color, which he applied thickly. 

PROJECT: create seascape in color and greyscale to be woven together

Step1: using a pencil draw a seascape: include the sky, water, sand and objects in sand (people, umbrellas, etc)
Step2: draw the same drawing a second time as close to the original as possible
Step3: paint in the first using color
Step4: add texture to the sand by adding salt while it is still wet


Step5: Paint second drawing an values of grey


Step6: once both paintings are complete cut one in strips vertically (be sure that you do not cut all the way through leave 1/4" at the edge to make weaving easier) 
Step7: Cut the second piece horizontally (cut these stripes all the way and place them slightly above your work space in the order in which they should be woven back in).
Step7: weave the two together creating a woven seascape.


MATERIALS: 
watercolor paper 
Liquid watercolor paints
salt
pencils
black and white acrylic paints for grey scale. 3 to 4 values of grey should be enough. 


Monoprint Reflection landscapes with Gregory Kondos


DISCUSSION:
Landscapes from a new perspective
Artist and the artwork: Sacramento River, 1981 Crocker Art Museum, Sacramento, CA
Washes
graded washes
centered horizon lines
reflective water
monochromatic
value
Mono prints

Artist: Gregory Kondos
1923-
Painter Gregory Kondos executes thickly painted landscapes known for their buttery spread of bright, warm color. Even the cool tones of the color blue in a Kondos painting are heated, evoking sun-warmed expanses of summer sky and waters. Perhaps this is because of the intense light that drenches the Sacramento and Napa Valleys that he likes to depict. Heat also plays a role, causing the regional landscape to shimmer in a veil of heavy air that mutes the intensity of color and broadly flattens detail. This, of course, is common in Sacramento, home to the artist, where he has painted and taught for half a century. 
In his use of high-keyed color and broad paint handling Kondos shows an affinity to artists such as Wayne Thiebaud, with whom he shares an abiding friendship, Roland Petersen, and Bay Area artist Raimonds Staprans. Unique to Kondos, however, is his verity to subject. Arguably, Petersen and Staprans overtly generalize the landscape, while Thiebaud’s landscape forays are about pattern and its role in establishing illusion. Kondos’s compositions are balanced in order to express not only the tranquility of the scene, but also the pleasure of solitary communion with nature. The artist offers, “If you look at my work, you will find qualities of quietness and cleanliness, but, above all, you’ll find that I’m a loner.” 
PROJECT: 
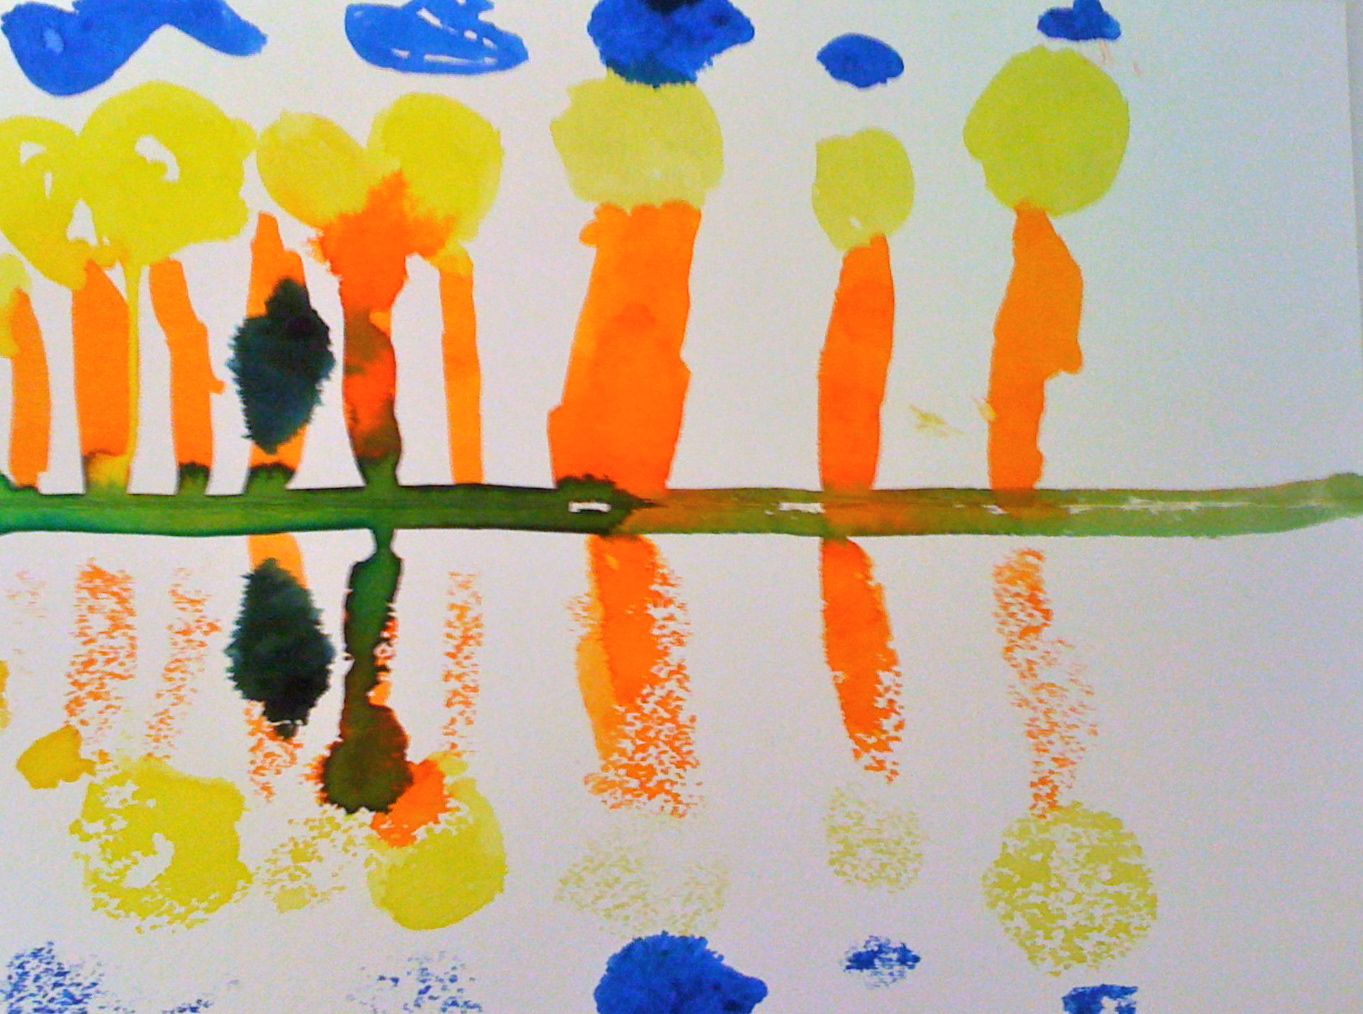
create a reflective landscape using the mono print method
Step1: Fold your paper in half horizontally
Step2: Using liquid watercolor Paint a tree trunk
Step3: fold your paper to print the tree trunk
Step4: continue painting and printing tree trunks until you have 3-7 trees
Step5: add a tree top on one of your trunks, fold and print your tree tops
Step6: continue until all of your trees have tops
Step7: add land under your trees, grass or hills, etc. and fold your paper to print them 
Step8: add your sky behind the trees, remember to print them before they dry you might print several times during teh painting process
Last: using wet brush with clear water pull the reflection slightly to give it a more real reflective quality
MATERIALS: 
watercolor paper
watercolors


Tuesday, June 14, 2011

Horizonless Landscape with Wayne Thiebaud


three hour class

Discuss landscapes
Practice: create three practice pages of washes and techniques that will be used in a later project.
horizon line,
Foreground, middle ground, background, perspective
Touch on these important art topics that will greatly enhance this final piece
         Line, shape, contour drawing pattern, warm color, complementary colors purple and yellow, blue and orange
PRACTICE: WATERCOLOR: Use practice papers in upcoming watercolor collage opportunities.
Practice and discuss many watercolor techniques
Wet-on-Dry watercolor
wet on wet watercolor
graded washes
lifting out
Dropping in color
adding white with oil pastels
Tour of the museum play ISPY to find all landscapes.
Look at the artwork Mr. Theibaud’s River Intersection
What do you notice first? Color? Shape? Line? Pattern?
What is this painting of?
Is it a landscape?
What is missing from a traditional landscape?
What perspective is this from? ant, airplane?
What colors do you notice?
where have you seen ideas like this before?
Take a moment to sketch anything you want to remember about this piece. 
Back in the classroom
Stretch and talk more about initial impressions
PROJECT: Create a watercolor landscape using the many ideas we have discussed
contour drawing with pencil
(REMEMBER TO DRAW LIKE A COLORING BOOK you will fill in with color after)
Step1: using curved line draw a line from the top of the page to the bottom
Step2: using straight line draw a line beside but not touching the first
Step3: draw a half circle along either side
Step4: draw in three horizontal lines from the vertical line to the sides 
Step5: draw in two diagonal lines on the opposite side
Step6: draw in one thick line from the straight line to the side 
Step7: draw in circles that get smaller from the foreground to the background
Step8: draw in patterns or rows of things in one of your square patches
Step9: pick a diagonal pattern and add in stripes
Step10: add in any additional information that you enjoyed from the original piece
Fill in with watercolor: remember some of the techniques you explored earlier
Step1: fill in your washes of color first (remember colors and techniques)
step2: Fill in your piece with color 
Step3: decide if you want to glue on any of your earlier practices pages as part of your final piece.

MATERIALS:
watercolors and Several watercolor papers for each student
pencils
glue