Showing posts with label Line. Show all posts

Monday, February 11, 2019

Modular Unit Repetition


Modular Unit Repetition

Objective: Use toothpicks to create a modular sculpture. Create a series of modular units and combine 20 together to make a free-standing, 3-dimensional form. 

Key Vocabulary: 
Modular: employing or involving a module or modules as the basis of design or construction.

Modular Sculpture: created by joining together standardized units (modules) to form larger, more complex compositions. In some works the units can be subsequently moved, removed and added to – that is, modulated – to create a new work of art, different from the original or ensuing configurations.

Repetition: The Art principle of repetition simply means the reusing of the same or similar elements throughout your design. Repetition of certain art elements in design will bring a clear sense of unity, consistency, and cohesiveness.

Unity: refers to a set of compositional strategies used by an artist to make the parts of the artwork work together as a whole through visual relatedness. Unity always expresses a shared commonality within a painting or sculpture or textile. 

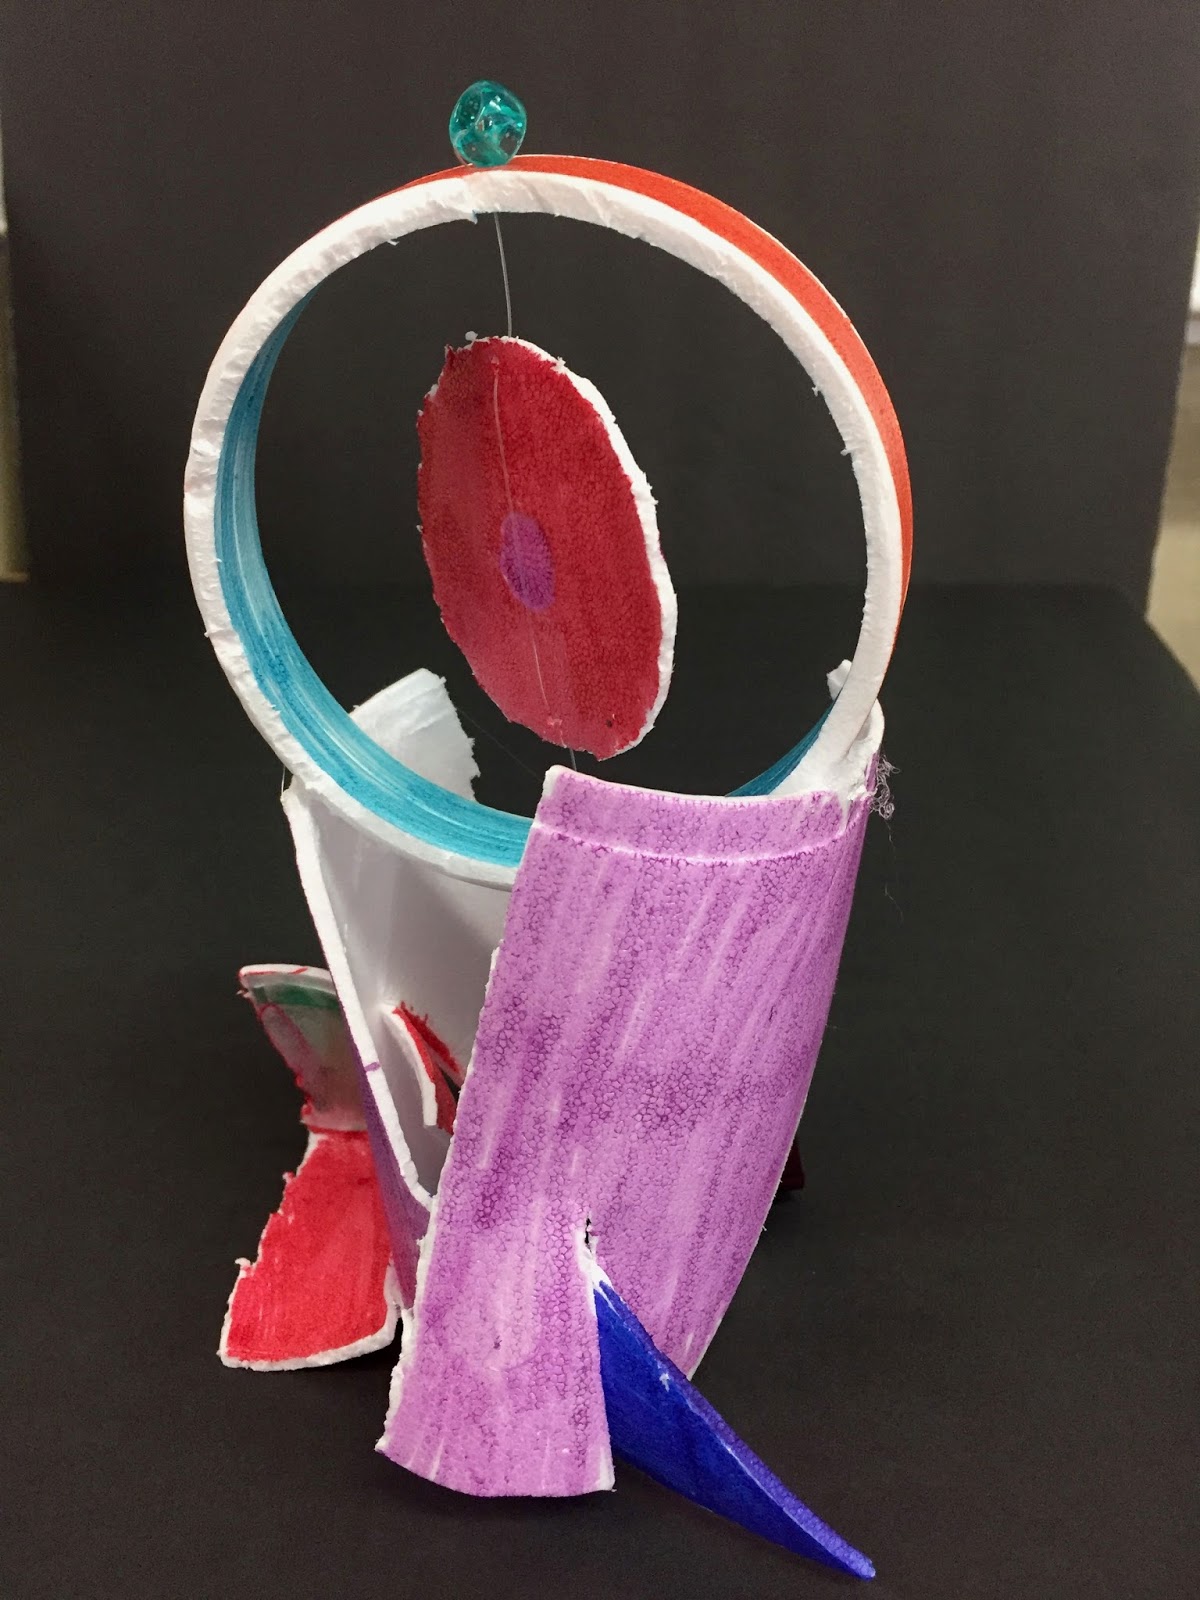
Non-objective art is not meant to look like anything (so don’t turn your toothpicks into a flower or cat!) but it also shouldn’t look like a random hot mess, either! •


ARTIST: Bean Finneran (1947-     ) 
American artist who was born in Cleveland, OH
Their work has featured in numerous exhibitions at key galleries and museums, including the Crocker Any Museum. 
Attended Goucher College, Baltimore, MD, University of Michigan, Ann Arbor, MI, Museum School, Boston Museum of Fine Arts, MA, Massachusetts College of Art, Boston, MA
The constructions are abstract rings, lines, cones, circles but often evoke real things: sea anemones, coral reefs, haystacks or wind-blown grasses.   
“I work with a simple elemental form, a curve made from the most basic natural material, clay. I make and build with hundreds or thousands of these forms. The clay curve connects me to time, the earth, the elements, and human culture.” —Bean Finneran
The sculptures cannot be moved without taking them apart and reconstructing them. 
sculptures are built curve-by-curve and disassembled one by one. 
This process of continual and possible change and transformation connects me to the natural world along with the ordered chaos that comes from organizing thousands upon thousands of individual elements into a form. 

CA Art Standards: 
1.5 Analyze the material used by a given artist and describe how its use influences the meaning of the work.
2.1 Solve a visual arts problem that involves the effective use of the elements of art and the principles of design.
3.3 Identify and describe trends in the visual arts and discuss how the issues of time, place, and cultural influence are reflected in selected works of art.
4.4 Articulate the process and rationale for refining and reworking one of their own works of art.
5.0 Develop competencies and creative skills in problem-solving, communication, and management of time and resources that contribute to lifelong learning and career skills.

Project Requirements: 
Sketchbook: Complete observational sketches in your sketchbook. Revisit the work of by artist Sol Lewitt and research the artist Bean Finneran.

Final Project: You will construct 20 of the same modular unit BEFORE combining all 20 into one sculpture. View the modules from several angles as you build. Consider the space created in between the toothpicks. How do light and shadow affect your module?
Students will need a 100 (or more) toothpicks (flat or round) in plain wood. Wood glue ONLY. Hot glue is not allowed as it leaves blobs.  
Sculpture must be at least 4”x4”x4” and be free-standing. 
Can be attached to a base (such as wood, cardboard, or foam core) 
Can be painted one color 

Units should be glued on hard movable surface (book, sketchbook) covered with wax paper. 


Saturday, March 11, 2017

Art Element Cup


Lesson Objective: Introduction to the art elements through a styrofoam cup

Key Vocabulary: 

Materials: 
Styrofoam Cup
Xacto Knife 
Hot Glue 

Focus: Elements of Art 

CA Art Standards:
1.1 Identify and use the principles of design to discuss, analyze, and write about visual aspects in the environment and in works of art, including their own.
1.3 Research and analyze the work of an artist and write about the artist's distinctive style and its contribution to the meaning of the work.
2.1 Solve a visual arts problem that involves the effective use of the elements of art and the principles of design.
2.2 Prepare a portfolio of original two-and three-dimensional works of art that reflects refined craftsmanship and technical skills.
3.3 Identify and describe trends in the visual arts and discuss how the issues of time, place, and cultural influence are reflected in selected works of art.
4.3 Formulate and support a position regarding the aesthetic value of a specific work of art and change or defend that position after considering the views of others.
5.0 Connecting and Applying What Is Learned in the Visual Arts to Other Art Forms and Subject Areas and to Careers

Modifications: 
English Language Learner: Handout for project, project samples, Power point with visuals, Critique for additional understanding, Demonstration of techniques
Special Needs: Handout for project, project samples, Power point with visuals, Critique for additional understanding, Demonstration of techniques
Accelerated Learner: Expand on skills learned to create a unique project. 

Scaffolding adaptations: 
Students will revisit art elements from the earlier learning. We will use similar visuals to refresh previous knowledge.  Notes will be taken throughout discussions for added understanding. Creating sketchbook plans and Constructing final project will be demo started in class using guided instruction.

Direct instruction: Art Elements: 

LINE
What is a line?
Geometrically, it connects two points. 
A line is a path traced by a moving point, i.e. a pencil point or a paintbrush. 
We see lines all around us. 
Line is a vital element of any artwork.
Actual 
Implied
Contour
Horizontal 
Vertical
Diagonal
Flat
Sharp/Angled
Gestural 

Actual Line: Marks or objects that are real lines; they exist physically. 
Examples of actual lines include lines painted on a highway, tree branches & Ladder.
Contour lines define the edges of objects:
Edges of a table
Edges of figure

Contour lines define both the edges of the object & the negative space between them
Implied Lines
Lines that we see in our mind’s eye that fill in the spaces between objects: 
Rows of windows in a large office building.
Outside line between fruit and background 
Sharply angled lines: Excitement, Anger, Danger & Chaos.
Gestural lines: reveal the touch of the artist’s hand, arm--and sometimes the entire body—in the artwork.
PROJECT: In Your sketchbook: 
Use your pencil
Draw three 3” squares
Try different ideas with a focus on LINE. 
How will you transition your line ideas to the cup? 

SHAPE: 
A shape is a closed line. A shape is flat.
The easiest way to see the shape of an object:  look at shadows. 
Shadows flatten a 3D object into a flat shape. 
Shadows enable you to see the object without details like color and texture.
Geometric Shape
Organic Shape
Implied Shape
Hard edge shape
Soft edge shape

Geometric shapes are mathematically determined
Organic shapes are the type you see in nature.
Implied Shape: The spaces between objects. We see those spaces as shapes, even though they are Implied. 
Hard Edged Shape: are clearly distinguished from each other 
Convey a sense of: 
order
clarity
strength.
Soft Edged Shape
Soft edged shapes have a tendency to blend with each other or the ground
Convey a sense of:
fluidity
flexibility
tend to feel lighter in weight.
PROJECT: In your sketchbook: Plan your cup using SHAPE
Use at one type of shape we discussed
organic
geometric
implied
hard edge
soft edge
When you have a concrete sketchbook plan completed/approved
Complete your plan using Practice cup and scissors 
If time allows, You can revisit: Line.

COLOR: 
Color has a huge effect on our daily lives.
Everyday our emotions, moods,  physical sensation (appetite) are influenced by the colors that surround us.
Primary: Red, Yellow, Blue
Secondary Colors: Green, Violet, Orange
Tertiary Colors: Yellow-Green, Yellow-Orange, Blue-Green, Blue-Violet, Red-Violet, Red-Orange
Complementary Colors
Colors Opposite on the color wheel: 
Red and Green
Yellow and Purple
Blue and Orange
High Contrast 
Draws attention
Analogous Colors
Colors Next door on the color wheel:
  Green and blue
Yellow and orange
Violet and red
Analogous colors blend with each other.

PROJECT: In your sketchbook: Plan your 3” Color cube side
Use at least two color schemes we discussed
Primary
Secondary
Tertiary 
Complementary
Analogous
When you have a concrete plan in place in your sketchbook:
Pick one of the 6 sides of your cube
Complete your plan using any materials provided 

VALUE : TINTS AND SHADES. VALUE is the lightness or darkness of a hue (color).
Pure Color (Hue) is located in the center of a value scale.
No added white or black
Color from the tube. 
Create lighter value by mixing white with pure color: This is called a TINT.
Create darker values by mixing black  with the Pure Color: This is called a SHADE.  

PROJECT: 
Create a Value Scale 
Hold your pencil in the middle to create a medium (pure) hue. 
Tint: Hold your pencil near the eraser
Shade: Hole your pencil near the lead. 
Create a five block value scale 
In your sketchbook: Plan value idea for the cup
Use value scale techniques we discussed
Add white and black to paint to show value scale
Use varying pressure with pencil to create value scale
 Use both techniques

When you have a concrete plan in place in your sketchbook:
Get it approved
Complete your plan using any materials provided 

Texture: The surface quality that can be seen and/or felt
Texture can be rough smooth soft or hard. (Actual) 
Textures do not always feel the way they look (visual).
The illusion of having physical texture.
Texture in 2D artwork
Artist gives the look of texture through the medium. 
Actual texture: the tactile qualities of the physical surface of the object. 

Differentiates from visual texture: It has a physical quality that can be felt by touch. 

PROJECT: In your sketchbook: 
Plan your texture for your cup
Use the two texture types we discussed
Visual
Tactile or Actual Texture

When you have a concrete Sketchbook plan approved 
Apply idea to your cup
Complete your plan using any materials provided 

SPACE: Positive shapes occupy positive space. 
The area around positive shapes (the background) is negative space. 
In this diagram, the negative shapes are as clear and distinct as the positive shapes.
Negative space: is the space around/between the subject(s) of an image. 
Negative space is most evident when the space around a subject forms an interesting/relevant shape. 
In this case, the NEGATIVE space: The Arrow. 
Space is  always a part of artwork
The setting a sculpture is in becomes part of how it is viewed and the overall effect 
Implied Space: Illusion. In two-dimensional (2D) work

PROJECT: In your sketchbook: Plan how you will show space in your cup
Use the types of Space we discussed
Positive/Negative
Implied
Overlapping
Size
Linear perspective 
When you have a concrete plan in place in your sketchbook:
Complete your plan using any materials provided 

FINAL PROJECT REQUIREMENTS: 
Design and create Art Elements Cup
Create sketchbook study of each element decision 
Complete each aspect of the cup with art elements based on knowledge gained in class discussions
Revise and refine final cup using various supplies provided 
Final cup should become a sculpture, must use all pieces of cup


Saturday, December 8, 2012

Collaboration: Mixed Movement Dot Circles with Sonya Delaunay, Elizabeth Murray and Seurat

THREE WEEK COLLABORATION PROJECT


Final Project at the end of third class 
WEEK 1

Discussion: 
Primary Color
Secondary color
Mixing colors to make new colors
Show a piece of Delaunay's artwork
Discuss color and shape

Artist:

Sonia Delaunay
(November 14, 1885December 5, 1979
Jewish-French artist 
Married to  Robert Delaunay 
Co-founded the Orphism art movement: noted for its use of strong colors and geometric shapes. 
Her work extends to painting, textile design and stage set design. 
She was the first living female artist to have a retrospective exhibition at the Louvre in 1964, and in 1975 was named an officer of the French Legion of Honor.
Her work in modern design included the concepts of geometric abstraction, the integration of furniture, fabrics, wall coverings, and clothing.


Project: Create mixed color circles for colloboraration canvas
Step1: Studenst mix two colors together in a small cup
Step2: studenst paint large circle on canvas

Materials: 
Tempura paint: primary secondary black and white
Paint brushes
30x40 canvas


WEEK 2

Discussion: Movement
Talk about movement and music in art work
Show Elizabeth Murray's work and ask if they see music
iPAD: Use the MOMA art app to add music to Murray's work and let studenst here the noises
No iPad: Study Keith Haring and talk about black movement lines

Artist: Elizabeth Murray (1940-2007):
Inspired by Abstract Expressionist Jackson Pollock’s work, as well as Pablo Picasso’s Cubist works 
American painter Elizabeth Murray’s oeuvre span styles from a Minimalist use form and color to bold, cartoonish Surrealism
Her works push the boundaries of a two-dimensional medium; the irregular triangles in the “Giant Maiden” series (1972) strain against the edges of canvases painted in high relief, while the explosive colors on an intricate collage-like canvas in Do the Dance (2005) lend the painting a kinetic, almost optical quality.


Project: using medium brushes have students add lines to circles
Step1: grab a brush with black paint and add one curved line 
step2: add a few straight lines

Materials: 
Black paint
Brushes
Circles canvas; see above. 

WEEK 3

Discussion: Dots
Mixing colors with your eye balls
Look at the Seurat work: Sunday on La Grande Jatte—1884
Ask students what they see (make sure they see the monkey) 
Have a close up of one spot on the final work that shows the dots. 
How does  the view mix the dots? Is this science? 

Artist: Georges Seurat 
(1859-1891)
French Painter
Invented pointillism
Took informal art lessons as a teen
Attended art school in Paris
He studied the relationship between lines and images and the effect light had on color
He wanted to know more about the emotional effect of color
He influenced science with his studies of colors


Project: add dots to the movement circles
Step1: using q-tips add put color dots to the final work

Materials
Tempura Paint
Q-tips


Wednesday, November 7, 2012

Movement Color Wheels with Elizabeth Murray


Discussion: 
Primary colors, RED YELLOW Blue 
What are they? Why are they so important? 
What does Primary Mean
Why are they so important/what do they do? 
Secondary colors ORANGE GREEN PURPLE
What are they
Create a color wheel
Show the colors mixing
Show Murray’s work
Discuss color
Discuss shape 
        If you could go into the artwork, where would you travel first?
Discuss Music
Discuss movement
Bring MoMA app on Ipad if you have it. 

ARTIST: Elizabeth Murray (1940-2007):
Inspired by Abstract Expressionist Jackson Pollock’s work, as well as Pablo Picasso’s Cubist works, American painter Elizabeth Murray’s oeuvre span styles from a Minimalist use form and color to bold, cartoonish Surrealism
Her works push the boundaries of a two-dimensional medium;
The irregular triangles in the “Giant Maiden” series (1972) strain against the edges of canvases painted in high relief, 
While the explosive colors on an intricate collage-like canvas in Do the Dance (2005) lend the Painting a kinetic, almost optical quality.

Project: Create Murray inspired shape drawing and mix primary and secondary colors
Step1: draw a circle on the left part of your page, the size of your fist
Step2: Draw an organic shape/circle next to the first, lower and on the right side but have it touching the first
Step3: Draw a third organic shape/circle next to the second, below and in the middle of the two but have it touching both
Step4: draw a line from each shape to an edge
Step4: Color the shapes in primary colors
Step5: in the background behind the red and blue shapes mix the two to make purple
Step6: in the background behind the red and yellow shapes mix the two to make orange
Step7: in the background behind the yellow and blue shapes mix the two to make green
Step8: add music and movement line line Murray. 

Materials: 
Oil pastels in Yellow red blue and Black
Tag board
pencils


Sunday, September 23, 2012

Zig Zag Hearts with Bridget Riley


Discussion: Line
What is a line?
 how important do you think it is for art?
 let’s name a few lines: Diagonal, Curved, spiral, think, thick, wavy,etc...

want to see drawn lines on paper begin to move?
 show Bridget Riley’s work, then begin to rotate it. 

Op Art: Op art works are abstract, with many of the better known pieces made in only black and white. When the viewer looks at them, the impression is given of movement, hidden images, flashing and vibration, patterns, or alternatively, of swelling or warping.
Op is short for optical illusion. Thinking we see something that we don’t. 

Artist: Bridget Riley (1931-       ) 
Famous as an early proponent of Op Art, Bridget Riley was born in South London. 
Riley’s artistic education: Goldsmiths college of art from 1949, then at the Royal College from 1952-5. 
Riley exhibited her artwork in a number of group shows at this early stage 1958.
A mental breakdown led Riley away from her studio in the late 1950s. 
Upon her recovery she took up a string of teaching posts. 
It was during this period that Riley honed her personal artistic style.
Played with pointillism
Riley discovered her own method of treating optics in paint.
The first painting rendered in this ground-breaking mode was ‘Kiss’ of 1961. The canvas is a sea of black, divided by an emerging white band which marks the space between two approaching bodies. 
The painting was immediately followed by Riley’s first solo show the following year, which took place at Gallery One in London, which showed her early monochromatic paintings.
Riley also exhibited in the 1965 New York show which first propelled the concept of ‘Op’ art into the media spotlight.
It was not until 1967 that she splashed into color and the optical possibilities
The following year, 1968, saw Riley being awarded the International Prize for Painting. 
She was the first British contemporary painter, and first woman, to receive the prestigious prize.
Commercial demand for Bridget Riley’s artwork peaked in the 1970s, but crumbled the following decade. The 1980s was a rather dark time for the artist as suddenly-and unexpectedly-her work fell out of fashion. 
But she never stopped working and recent years have witnessed a revival in her popularity,Musee d’Art Moderne de la Ville, Paris, hosted their own Riley retrospective in 2008.
A freshly-discovered interest in Riley’s artwork has also been echoed in art market sales. 
In 2008 Sotherby’s London sold Riley’s ‘Chant 2’ of 1967 for over £2.5m.

PROJECT: 
Create an Op Art Piece using Black lines
Step1: using a pencil lightly draw a heart in the center of your paper
Step2: using black sharpie, draw horizontal straight lines to the heart
Step3: When you get to the heart zig zag your lines
Step4: On the other side of your heart go back to straight lines. 
Step5: Continue with the steps until it is complete. 

MATERIALS: 
White paper
Black Pens or sharpies


Wednesday, May 2, 2012

Tooling Foil Masks with Folk Artists


Discussion: Mayan Masks
Pattern
Tin Art
Folk Artists
Folk Art Tin work, known in Mexico as hojalata, goes back to the 16th Century. Artists use natural, oxidized and brightly lacquered paints to create ornaments, nichos, mirrors, lanterns and other decorative pieces. Our interesting variety of tin work comes from Oaxaca where the artists use more natural and lacquered tin, and from San Miguel de Allende where oxidized tin is more popular.
The Maya occupied a vast area covering southeast Mexico and the Central American countries of Guatemala, Belize, Honduras and El Salvador. Mayan culture began to develop in the Pre-Classic period, around 1000 B.C. and was at its heyday between 300 and 900 A.D. The Maya are well known for their writing, of which a great part can now be read, as well as for their advanced mathematics, astronomy and calendrical calculations.
Mayan masks had a wide variety of uses: 
Some of the most complex masks were created to adorn the faces of the dead.
The Mayan's wore masks during important events, including during battle.
Whatever the use of masks in battle was, today’s scholars are able to learn a lot about the Mayan civilization from surviving masks made by the Mayan people.
There were also masks that showed the faces of people. We know that some masks were used in wedding ceremonies, 
There were masks made to commemorate many births and deaths.
The Mayan's also used masks for entertainment.
The uses of masks by the Mayan people were as varied as the style of the masks themselves.

Tips for tooling Foil: 
Use dull pencils (we used colored pencils
Work on a pad of folded newspaper
Project create a two tear tooling foil sun mask 
Step1: On the first square, draw a new pattern on each of the four sides
Step2: cut the corners off the second square turning it into a circle
Step3: Think about what type of mask you are making, add eyes, nose, mouth, ears hair, etc. 
Step4: using sharpies color both of the tooling foil pieces
Step5: using a large bead hot glue the square pattern foil underneath the round, mask foil 

MATERIALS: 
2 sheets of 5”x 5” tooling foil
Dull pencils
Newspaper
Sharpie markers. 
Hot glue gun
Beads


Friday, October 28, 2011

Line, Pattern and Repetition with Alexander Calder


DISCUSSION: LINE, Repetition, Pattern
What is a line? 
What kinds of lines can you think of?
Where do we see line in Nature?
         What happens when you repeat the same line over and over?
            pattern like fish scales. 
  Look at Alexander Calder, Gold Fish Bowl, 1929, wire, 16 x 15 x 6"
                    talk about all the different lines you see.

ARTIST: Alexander Calder
(22 July 1898 – 11 November 1976)
famous for inventing the mobile
Alexander Calder also created paintings, lithographs, toys, tapestry and jewelry.
Salmon:  Show the pictures of the fish
What do you see?
How do it’s colors protect it?
                 The gray on the top of the fish protect it from predators above.
                 The pink on the bottom of the fish protect it from predators below.
             Where do you see line/shape/texture?
PROJECT: draw Salmon using lines inspired by Calder
WORK TOGETHER ON THE PROJECT SO YOU DON’T LEAVE ANYONE BEHIND
Sharpie:
Step 1: draw the oval shape of the fish body
Step2: draw each of the fish fins and it’s eye
Step3: use the letter C  lines to create scales on the bottom of the  body
Step4: use straight lines to define each of the fins
Step5: use  a curved line to draw in the gills
Step6: draw circles on the top of the body to look like rocks
Step7: use simple lines to create plant life on the bottom of the page
Watercolor:
Use grays and greens for the top of the body
Use: pinks  for the bottom of the body
Use: any colors you choose for the plant life
Use: blues to fill in the remaining white of your page for water
METALLIC WATERCOLOR:
Use silver to  add some  metallic shine to your fish body
MATERIALS: 
Watercolor tins,      sharpies,      brushes,       water,       cups
Liquid watercolors in: pink, blue, green, grey, orange, one mettalic