Showing posts with label shape. Show all posts

Thursday, January 4, 2018

Repeated Paper Modules


Repeated Paper Modules 

PROJECT OBJECTIVE: 
Create a repeated Paper Module Sculpture inspired by origami
Fold, curl, twist or crumple paper (magazine pages, printed out photos, maps, book pages, etc.) and create 30-60 of the same form (they can be different sizes). Glue the papers into either a 3D-sculptural form or a relief sculpture on painted cardboard. This piece should emphasize unity/variety and balance.

PRESENTATION: 
Critical to 3-D production, students must consider presentation: 
  • Freestanding
  • Suspension
  • Relief
  • Pedestal
  • Consider the environment

CA ART STANDARDS
1.5 Analyze the material used by a given artist and describe how its use influences the meaning of the work.
2.1 Solve a visual arts problem that involves the effective use of the elements of art and the principles of design.
3.4 Discuss the purposes of art in selected contemporary cultures
4.1 Articulate how personal beliefs, cultural traditions, and current social, economic, and political contexts influence the interpretation of the meaning or message in a work of art.
4.4 Articulate the process and rationale for refining and reworking one of their own works of art.
5.2 Create a work of art that communicates a cross-cultural or universal theme taken from literature or history.

DISCUSSION: 
  • Origami historians argue that since the invention of paper is credited to Ts'ai Lun of China in A.D.105, paper folding must have been invented soon after. 
  • Paper was then introduced to Japan in the late sixth century by Buddhist monks, and paper folding was brought along with it. 
  • In Japan, paper was considered an expensive commodity, and it was used in many aspects of Japanese life, most notably in architecture. 
  • Historians claim that origami is definitely a Japanese invention. 
  • Regardless of its ultimate origin, Japan is recognized as the country that most fully developed the traditional art of origami.
  • The Japanese transmitted their designs via an oral tradition
  • Recreational designs being passed from mother to daughter. 
  • Because nothing was ever written down, only the simplest designs were kept. 
  • The first written instructions appeared in AD 1797 with the publication of the Thousand Crane Folding 
  • The name origami was coined in 1880 from the words oru (to fold) and kami (paper). Previously, the art was called orikata ("folded shapes”).
Origami generally involves folding a square piece of paper into a two or three dimensional object. 

Folding paper in origami is typically performed by hand only on a smooth surface, but can include tools: including a scorer, embosser, paper clips and tweezers.

Origami has a strong link to mathematics, and can be seen used in practical solutions such as airbags in vehicles

Origami has been a common subject of copyright issues, as designs have been often stolen and republished.

ARTIST: 
  • Richard Sweeney was born in Huddersfield, England in 1984. 
  • He discovered a talent for sculpture at Batley School of Art and Design in 2002
  • He studied Three Dimensional Design at the Manchester Metropolitan University, 
  • He concentrated on the hands-on manipulation of paper to create design models, which ultimately developed into sculptural pieces in their own right.
  • Richard’s practice combines the disciplines of design, photography, craft and sculpture, resulting in a varied output of work including graphic design and public sculpture commissions. 
  • Richard seeks to maintain an experimental, hands-on approach, utilizing the unique properties of often mundane materials to discover unique sculptural forms. 
  • He regularly holds workshops to share his knowledge of paper folding and construction techniques

PROJECT REQUIREMENTS: 
  • Create a repeated paper modules sculpture
  • Fold, curl, or origami paper (your choice of paper: magazine pages, printed out photos, maps, book pages, etc.) 
  • Create min: 50-100 of the same form (they can be different sizes). 
  • Sculpture should emphasize unity, variety, and balance.
  • Student must consider presentation: suspension, relief or free standing on floor/base


Saturday, March 11, 2017

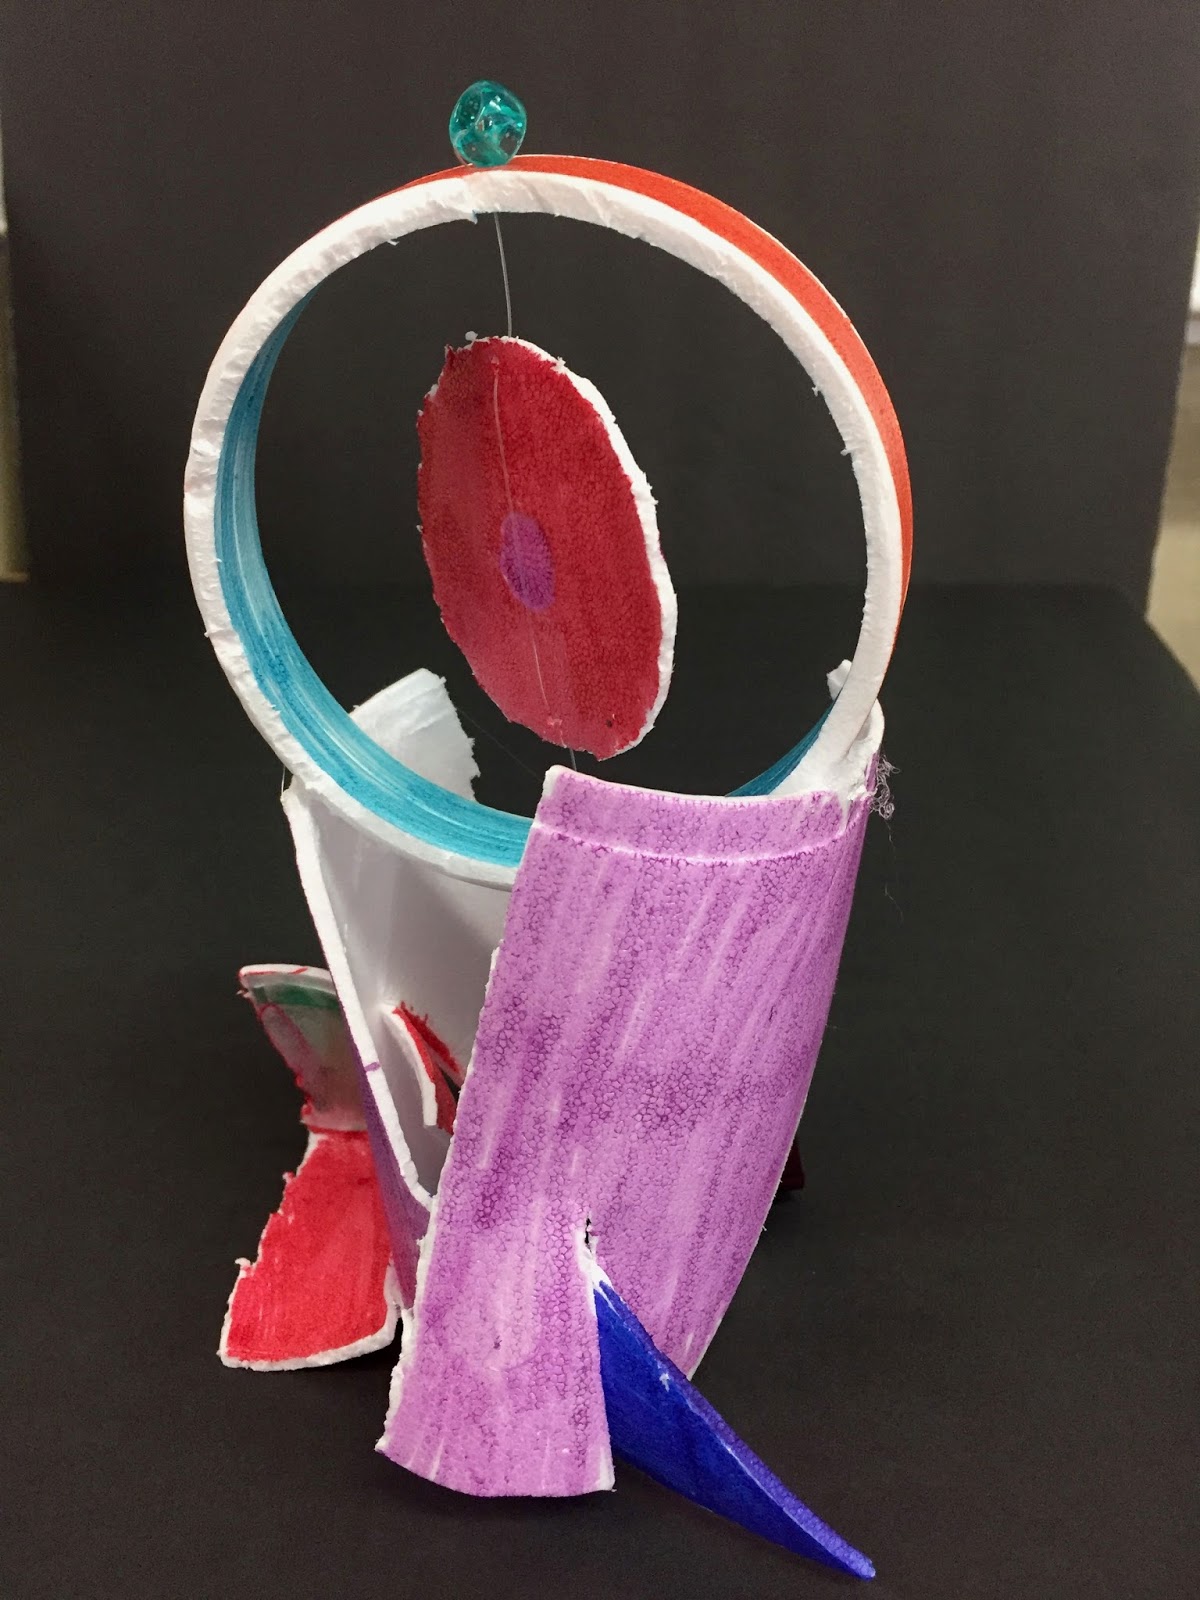
Art Element Cup


Lesson Objective: Introduction to the art elements through a styrofoam cup

Key Vocabulary: 

Materials: 
Styrofoam Cup
Xacto Knife 
Hot Glue 

Focus: Elements of Art 

CA Art Standards:
1.1 Identify and use the principles of design to discuss, analyze, and write about visual aspects in the environment and in works of art, including their own.
1.3 Research and analyze the work of an artist and write about the artist's distinctive style and its contribution to the meaning of the work.
2.1 Solve a visual arts problem that involves the effective use of the elements of art and the principles of design.
2.2 Prepare a portfolio of original two-and three-dimensional works of art that reflects refined craftsmanship and technical skills.
3.3 Identify and describe trends in the visual arts and discuss how the issues of time, place, and cultural influence are reflected in selected works of art.
4.3 Formulate and support a position regarding the aesthetic value of a specific work of art and change or defend that position after considering the views of others.
5.0 Connecting and Applying What Is Learned in the Visual Arts to Other Art Forms and Subject Areas and to Careers

Modifications: 
English Language Learner: Handout for project, project samples, Power point with visuals, Critique for additional understanding, Demonstration of techniques
Special Needs: Handout for project, project samples, Power point with visuals, Critique for additional understanding, Demonstration of techniques
Accelerated Learner: Expand on skills learned to create a unique project. 

Scaffolding adaptations: 
Students will revisit art elements from the earlier learning. We will use similar visuals to refresh previous knowledge.  Notes will be taken throughout discussions for added understanding. Creating sketchbook plans and Constructing final project will be demo started in class using guided instruction.

Direct instruction: Art Elements: 

LINE
What is a line?
Geometrically, it connects two points. 
A line is a path traced by a moving point, i.e. a pencil point or a paintbrush. 
We see lines all around us. 
Line is a vital element of any artwork.
Actual 
Implied
Contour
Horizontal 
Vertical
Diagonal
Flat
Sharp/Angled
Gestural 

Actual Line: Marks or objects that are real lines; they exist physically. 
Examples of actual lines include lines painted on a highway, tree branches & Ladder.
Contour lines define the edges of objects:
Edges of a table
Edges of figure

Contour lines define both the edges of the object & the negative space between them
Implied Lines
Lines that we see in our mind’s eye that fill in the spaces between objects: 
Rows of windows in a large office building.
Outside line between fruit and background 
Sharply angled lines: Excitement, Anger, Danger & Chaos.
Gestural lines: reveal the touch of the artist’s hand, arm--and sometimes the entire body—in the artwork.
PROJECT: In Your sketchbook: 
Use your pencil
Draw three 3” squares
Try different ideas with a focus on LINE. 
How will you transition your line ideas to the cup? 

SHAPE: 
A shape is a closed line. A shape is flat.
The easiest way to see the shape of an object:  look at shadows. 
Shadows flatten a 3D object into a flat shape. 
Shadows enable you to see the object without details like color and texture.
Geometric Shape
Organic Shape
Implied Shape
Hard edge shape
Soft edge shape

Geometric shapes are mathematically determined
Organic shapes are the type you see in nature.
Implied Shape: The spaces between objects. We see those spaces as shapes, even though they are Implied. 
Hard Edged Shape: are clearly distinguished from each other 
Convey a sense of: 
order
clarity
strength.
Soft Edged Shape
Soft edged shapes have a tendency to blend with each other or the ground
Convey a sense of:
fluidity
flexibility
tend to feel lighter in weight.
PROJECT: In your sketchbook: Plan your cup using SHAPE
Use at one type of shape we discussed
organic
geometric
implied
hard edge
soft edge
When you have a concrete sketchbook plan completed/approved
Complete your plan using Practice cup and scissors 
If time allows, You can revisit: Line.

COLOR: 
Color has a huge effect on our daily lives.
Everyday our emotions, moods,  physical sensation (appetite) are influenced by the colors that surround us.
Primary: Red, Yellow, Blue
Secondary Colors: Green, Violet, Orange
Tertiary Colors: Yellow-Green, Yellow-Orange, Blue-Green, Blue-Violet, Red-Violet, Red-Orange
Complementary Colors
Colors Opposite on the color wheel: 
Red and Green
Yellow and Purple
Blue and Orange
High Contrast 
Draws attention
Analogous Colors
Colors Next door on the color wheel:
  Green and blue
Yellow and orange
Violet and red
Analogous colors blend with each other.

PROJECT: In your sketchbook: Plan your 3” Color cube side
Use at least two color schemes we discussed
Primary
Secondary
Tertiary 
Complementary
Analogous
When you have a concrete plan in place in your sketchbook:
Pick one of the 6 sides of your cube
Complete your plan using any materials provided 

VALUE : TINTS AND SHADES. VALUE is the lightness or darkness of a hue (color).
Pure Color (Hue) is located in the center of a value scale.
No added white or black
Color from the tube. 
Create lighter value by mixing white with pure color: This is called a TINT.
Create darker values by mixing black  with the Pure Color: This is called a SHADE.  

PROJECT: 
Create a Value Scale 
Hold your pencil in the middle to create a medium (pure) hue. 
Tint: Hold your pencil near the eraser
Shade: Hole your pencil near the lead. 
Create a five block value scale 
In your sketchbook: Plan value idea for the cup
Use value scale techniques we discussed
Add white and black to paint to show value scale
Use varying pressure with pencil to create value scale
 Use both techniques

When you have a concrete plan in place in your sketchbook:
Get it approved
Complete your plan using any materials provided 

Texture: The surface quality that can be seen and/or felt
Texture can be rough smooth soft or hard. (Actual) 
Textures do not always feel the way they look (visual).
The illusion of having physical texture.
Texture in 2D artwork
Artist gives the look of texture through the medium. 
Actual texture: the tactile qualities of the physical surface of the object. 

Differentiates from visual texture: It has a physical quality that can be felt by touch. 

PROJECT: In your sketchbook: 
Plan your texture for your cup
Use the two texture types we discussed
Visual
Tactile or Actual Texture

When you have a concrete Sketchbook plan approved 
Apply idea to your cup
Complete your plan using any materials provided 

SPACE: Positive shapes occupy positive space. 
The area around positive shapes (the background) is negative space. 
In this diagram, the negative shapes are as clear and distinct as the positive shapes.
Negative space: is the space around/between the subject(s) of an image. 
Negative space is most evident when the space around a subject forms an interesting/relevant shape. 
In this case, the NEGATIVE space: The Arrow. 
Space is  always a part of artwork
The setting a sculpture is in becomes part of how it is viewed and the overall effect 
Implied Space: Illusion. In two-dimensional (2D) work

PROJECT: In your sketchbook: Plan how you will show space in your cup
Use the types of Space we discussed
Positive/Negative
Implied
Overlapping
Size
Linear perspective 
When you have a concrete plan in place in your sketchbook:
Complete your plan using any materials provided 

FINAL PROJECT REQUIREMENTS: 
Design and create Art Elements Cup
Create sketchbook study of each element decision 
Complete each aspect of the cup with art elements based on knowledge gained in class discussions
Revise and refine final cup using various supplies provided 
Final cup should become a sculpture, must use all pieces of cup


Wednesday, December 31, 2014

Slotted Color Sculptures with Josef Albers


Lesson Objective
Work with elements of art: Color 
Work with principles of Art: Scale 
Create a Slotted color sculpture exploring color relationships 

Key Vocabulary: 
Hue
Value
Intensity
Chroma
Saturation
Contrast 
Complementary Colors
Simultaneous Contrast 
Successive Contrast 
Color Schemes (relationships)

Materials: 
Foam Core 
Paint
Exato Knives

Focus Artists: 
Josef Albers 

Beg: Project Requirements: Create a Slotted color sculpture exploring color relationships 
Sketchbook: Students will draw color plans for each side of their slotted sculpture and
submit plans for approval. Required: 
Square slotted format for each side (Construction)
Color Relationships (5 different schemes minimum)
Color Placement (Neighbors/Scale)
All sides and angles of the sculpture (Details)
Scale as it pertains to final look of sculpture
Create Free-standing Slotted Sculpture exploring Josef Albers studies on color
Precision (Painting and Slot Construction)
Scale (How color looks from ALL sides)

Adv: Project Requirements: Create a Slotted color sculpture exploring color relationships 
Sketchbook: Students will draw color plans for each side of their slotted sculpture and submit plans for approval. Required:
Slotted, one shape format for each side (Construction)
Color Relationships (8 different schemes, minimum)
Color Placement (Neighbors)
All sides and angles of the sculpture (Details)
Scale as it pertains to final look of sculpture
Create Free-standing Slotted Sculpture exploring Josef Albers color studies 
Precision (Painting and Slot Construction)
Scale (How color looks from ALL sides)

Assessment: 
Informal: Written Peer Critique
Formal: Artist Statement
Formal: Grading final sculpture

CA STANDARDS: 
1.1 Identify and use the principles of design to discuss, analyze, and write about visual aspects in the environment and in works of art, including their own. 
1.3 Research and analyze the work of an artist and write about the artist's distinctive style and its contribution to the meaning of the work.
1.5 Analyze the material used by a given artist and describe how its use influences the meaning of the work.
2.2 Plan and create works of art that reflect complex ideas, such as distortion, color theory, arbitrary color, scale, expressive content, and real versus virtual. 
4.5 Employ the conventions of art criticism in writing and speaking about works of art.
5.2 Compare and contrast works of art, beyond the obvious and identifying psychological content found in the images

Modifications: 
English Language Learner: Handout for project, project samples, Power point with visuals, Critique for additional understanding, Demonstration of techniques
Special Needs: Handout for project, project samples, Power point with visuals, Critique for additional understanding, Demonstration of techniques
Accelerated Learner: Expand on skills learned to create a unique project. 
Advanced art students will be asked to increase the difficulty of their final sculpture They will also be expected incorporate 8 color schemes in final sculpture. 

Scaffolding adaptations: 
Students will revisit color and line from the earlier learning. We will use similar visuals to refresh earlier learning.  Notes on color, scale and artists will be taken throughout discussions for added understanding. Creating sketchbook plans and Constructing final sculpture will be demo started in class using guided instruction. 

Art Link: 
Science and Art
How have we used science in the course already? 

INTRODUCTION to lesson (Anticipatory set): 
Watch a video on Josef Albers and his work 
Use discussion form to enhance learning

OBJECTIVE: Using Slotted Sculpture as your 3-D Form 
Create Free-Standing Artwork exploring 6 different color Schemes/Relationships
Must Complete Sculpture from all Angles
Discuss Science and Art as pre-assessment
Discuss and practice drawing your final project on paper
Work closely with teacher before moving to foam core
Students will understand new vocabulary as is relates to visual art: 
PURPOSE: Complete Free-Standing, Slotted sculpture exploring color relationships. 

INSTRUCTION: 
Students will discover review the elements of color and Scale. they look at the artwork of Josef Calder and create a Slotted sculpture piece as a final art project. 

DIRECT INSTRUCTION:
Day 1 and 2: Power Point Presentation Color and Albers
Pre-assessment: Science and Art
Opening: Art Link: Quote from Albers on Science and Art
Review: Elements of art 
Discussion: Color
Key Vocabulary featured on PPT with visuals: 
Hue
Value
Intensity
Chroma
Saturation
Contrast 
Complementary Colors
Simultaneous Contrast 
Successive Contrast 
Color Schemes (relationships)

ART HISTORY: Josef Albers 
German-born American artist and educator 
He worked, both in Europe and in the United States
Taught at Yale University
He formed the basis for the most influential and far-reaching art education programs of the 20th century.
Studied color with paper
Avoids mixing paint
Saves time and materials
Gain active interest, no prep
Precision of tone, light and surface quality
No texture (i.e. brush strokes)
Huedoku: Students play the app Huedoku to see their learning at work. The app is created from Albers studies and allows students to place colors in the right order based on hue. Students will both watch and play. Student playing will be active in color placement students watching will observe how color changes based on its neighbors. 
Review each Color scheme on last slide to check for understanding 
Teacher Models: 
Color throughout discussion 
Students take notes in their sketchbooks 
Teacher Monitors throughout discussion
The game Huedoku on how to play with three color boxes 
Check for Understanding: 
Monitor room during Pre-assessment in sketchbook
Monitor throughout discussion ensure comprehension and active note taking 
Students play the Huedoku App with 4 color boxes and higher

Present Rubric through Power Point Slides: 
FINAL PROJECT:  Using color relationships considering colors will be placed next to each other on final sculpture 
Students will draw  plans for their Color sculpture before moving to paint stage
They must consider:
Color Relationships
Color Placement
All sides and angles of the sculpture
Scale as it pertains to final look of color on sculpture
Create Free-standing Slotted Sculpture exploring Josef Albers studies on color

Day 3: Students receive a full day to create and label their five color schemes 
Students show me their color schemes to show understanding and receive foam core
Day 4: Students measure and cut slots based on model I presented or their own ideas. 
Student will use exact knives to achieve slot cuts
Safety Measures in place: 
Watch a video about how to cut slots on youtube
Teacher passes out and retrieves exacto knives 
Students must have a partner also ready to make cuts before receiving 
exacto knife
Students are reminded about keeping thumbs in and watching partners
throughout exacto use
Teacher monitors exacto knives by observing each table throughout 
class time. 
Day 5: Slot Cutting Continues
Day 6: Students begin paint planning
Once slots are in place and structure is complete
Students will begin to add paint lines and details on the final sculpture
This planning will help complete painting of each color scheme
Paint is applied in the style of Josef Albers Squares
Day 7: Painting Continues
Albers Reflection through Art Link (15 Minutes)
Students read a quote from Josef Albers
They are reminded about how we got to this stage of our sculpture
They are asked to read through their notes and find their favorite fact as a table 
group
They discuss and expand on the fact and present their discussion to the class
This will prepare students for upcoming Critique
Students are asked to take notes on this process for Friday sketchbook checks
Students return to their stage of the sculpture 
Day 8: Full studio Day
All students should begin the painting Process today
Check the room for students who are lingering in the slot phase or color 
planning phase
Day 9: Critiques: 
Peer Critiques
Directions: Present to the class first by Power Point
Show the rubric on Power Point 
Review Rubric Goals
Remind students to critique by rubric
Students can partner with anyone in the room but a table mate
Students will exchange sculptures 
Each student will create a written critique about their partners work
Each student should address goals achieved and goal 
opportunities
Students should use the name Albers at least once
Students should refer to a Rubric Goal at least twice
Students should incorporate key vocabulary throughout. 
Critique is based on Rubric Goals
Students will exchange their written critiques
Read and discuss new goals with their partner
Day 10: Full studio Day 
Focus on New Goals from yesterday critique
Focus on getting to the halfway mark of your painting process
Day 11: Full studio Day 
All should be at the 3/4 way mark by the end of the day 
Day 12: Final day of sculpture (November 10)
Students should complete sculpture today and be ready for Artist Statement 
Turn in completed sculptures at the end of the period. 


Day 13: Artist Statement (November 12)


Saturday, December 8, 2012

Collaboration: Mixed Movement Dot Circles with Sonya Delaunay, Elizabeth Murray and Seurat

THREE WEEK COLLABORATION PROJECT


Final Project at the end of third class 
WEEK 1

Discussion: 
Primary Color
Secondary color
Mixing colors to make new colors
Show a piece of Delaunay's artwork
Discuss color and shape

Artist:

Sonia Delaunay
(November 14, 1885December 5, 1979
Jewish-French artist 
Married to  Robert Delaunay 
Co-founded the Orphism art movement: noted for its use of strong colors and geometric shapes. 
Her work extends to painting, textile design and stage set design. 
She was the first living female artist to have a retrospective exhibition at the Louvre in 1964, and in 1975 was named an officer of the French Legion of Honor.
Her work in modern design included the concepts of geometric abstraction, the integration of furniture, fabrics, wall coverings, and clothing.


Project: Create mixed color circles for colloboraration canvas
Step1: Studenst mix two colors together in a small cup
Step2: studenst paint large circle on canvas

Materials: 
Tempura paint: primary secondary black and white
Paint brushes
30x40 canvas


WEEK 2

Discussion: Movement
Talk about movement and music in art work
Show Elizabeth Murray's work and ask if they see music
iPAD: Use the MOMA art app to add music to Murray's work and let studenst here the noises
No iPad: Study Keith Haring and talk about black movement lines

Artist: Elizabeth Murray (1940-2007):
Inspired by Abstract Expressionist Jackson Pollock’s work, as well as Pablo Picasso’s Cubist works 
American painter Elizabeth Murray’s oeuvre span styles from a Minimalist use form and color to bold, cartoonish Surrealism
Her works push the boundaries of a two-dimensional medium; the irregular triangles in the “Giant Maiden” series (1972) strain against the edges of canvases painted in high relief, while the explosive colors on an intricate collage-like canvas in Do the Dance (2005) lend the painting a kinetic, almost optical quality.


Project: using medium brushes have students add lines to circles
Step1: grab a brush with black paint and add one curved line 
step2: add a few straight lines

Materials: 
Black paint
Brushes
Circles canvas; see above. 

WEEK 3

Discussion: Dots
Mixing colors with your eye balls
Look at the Seurat work: Sunday on La Grande Jatte—1884
Ask students what they see (make sure they see the monkey) 
Have a close up of one spot on the final work that shows the dots. 
How does  the view mix the dots? Is this science? 

Artist: Georges Seurat 
(1859-1891)
French Painter
Invented pointillism
Took informal art lessons as a teen
Attended art school in Paris
He studied the relationship between lines and images and the effect light had on color
He wanted to know more about the emotional effect of color
He influenced science with his studies of colors


Project: add dots to the movement circles
Step1: using q-tips add put color dots to the final work

Materials
Tempura Paint
Q-tips


Tuesday, July 24, 2012

Texture Printmaking with Wayne Thiebaud


Discussion: 
What is texture? 
How does your hair feel?
How does the bottom of your show feel?
Do they feel the same?
What about tree bark vs. A puppy? 
Art and texture: 
The job of an artist is to create visual texture
A dog might look fluffy and a marble would be shiny and smooth
Printmaking: do you print things at home? 
How do you print them?
How do we print in art: smash pictures or folding pictures in half
There are many techniques in art for printmaking
Mono-print: creating one print from an original piece of art
Look at Wayne Thiebaud’s Gum ball machine painting and discuss how he might have drawn it. 
ARTIST: Wayne Thiebaud 
(born November 15, 1920) 
He is an American painter 
His most famous works are of cakes, pastries, boots, toys and lipsticks
He is associated with the Pop art movement because of his interest in objects of mass culture,
although his works, executed during the fifties and sixties, slightly predate the works of the classic pop artists. 
Thiebaud uses heavy pigment and exaggerated colors to depict his subjects
well-defined shadows characteristic of advertisements are almost always included in his work.
Project: Create mono-print gum ball machine from sand paper
Step1: on your 4x6 piece of sand paper: with a black oil pastel, draw a large circle on the top half
Step2: Draw a square underneath your circle
Step3: add a half circle on top of your first circle
Step4: add a small circle inside your square
Step5: color in your square and small half circle with the same color
Step6: color in your small circle black to show where the gum balls come out
Step7: fill your machine with different colored gum balls
Step8: once complete, adult uses an iron to melt picture onto your tag board paper
Note: These come out like a print, they might not be exact. 
MATERIALS: 
Oil pastels
Sand paper (light)
Iron
Heavy card stock or tag board paper


I loved the addition of the 25 cents but you might warn young students that it will print backwards.